DRESS MEASUREMENT

Measuring

Drawing measurements on your scan

Once a scan is finished you can draw a measurement straight onto the photos. The app turns the lines you draw into a circumference or a length and saves it to the profile.

Drawing needs three things in place: a completed scan on the profile, a height on that profile, and the Body Scan mode set to Camera. With those done, a measurement label opens the scan photos instead of the number pad.

How do I start a measurement on the scan?

Tap the label you want on the body. A measurement that is still empty goes straight to the drawing screen. One that already has a value opens as a summary first, showing the value, the date and how it was taken, with a New Entry button that starts a fresh drawing. The old value stays until you accept a new one.

How do I measure a circumference?

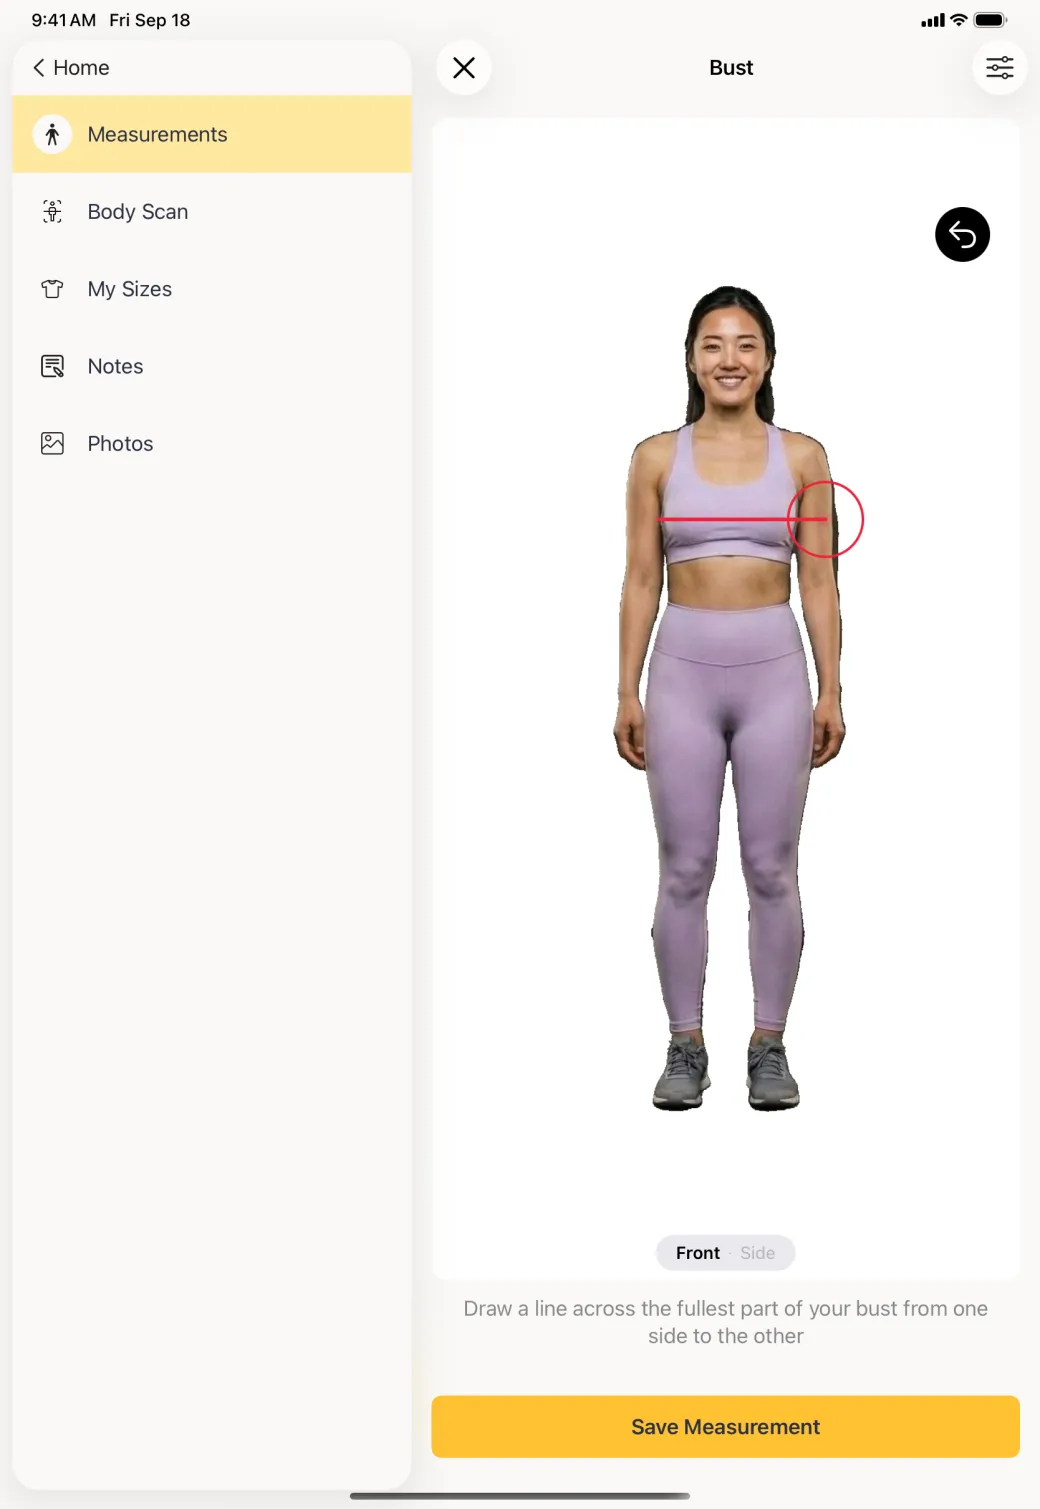
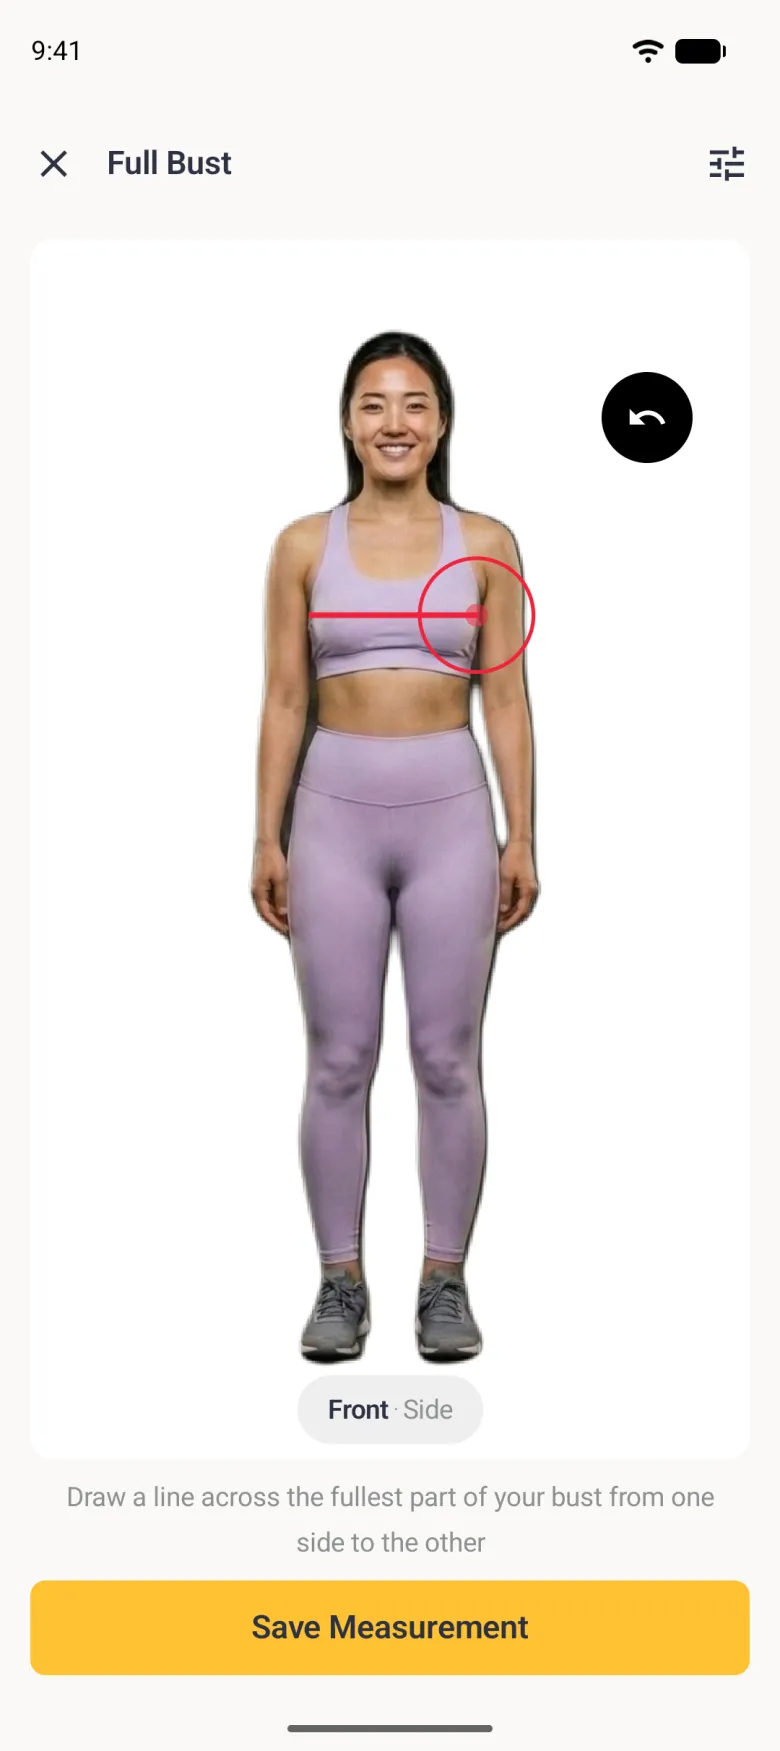
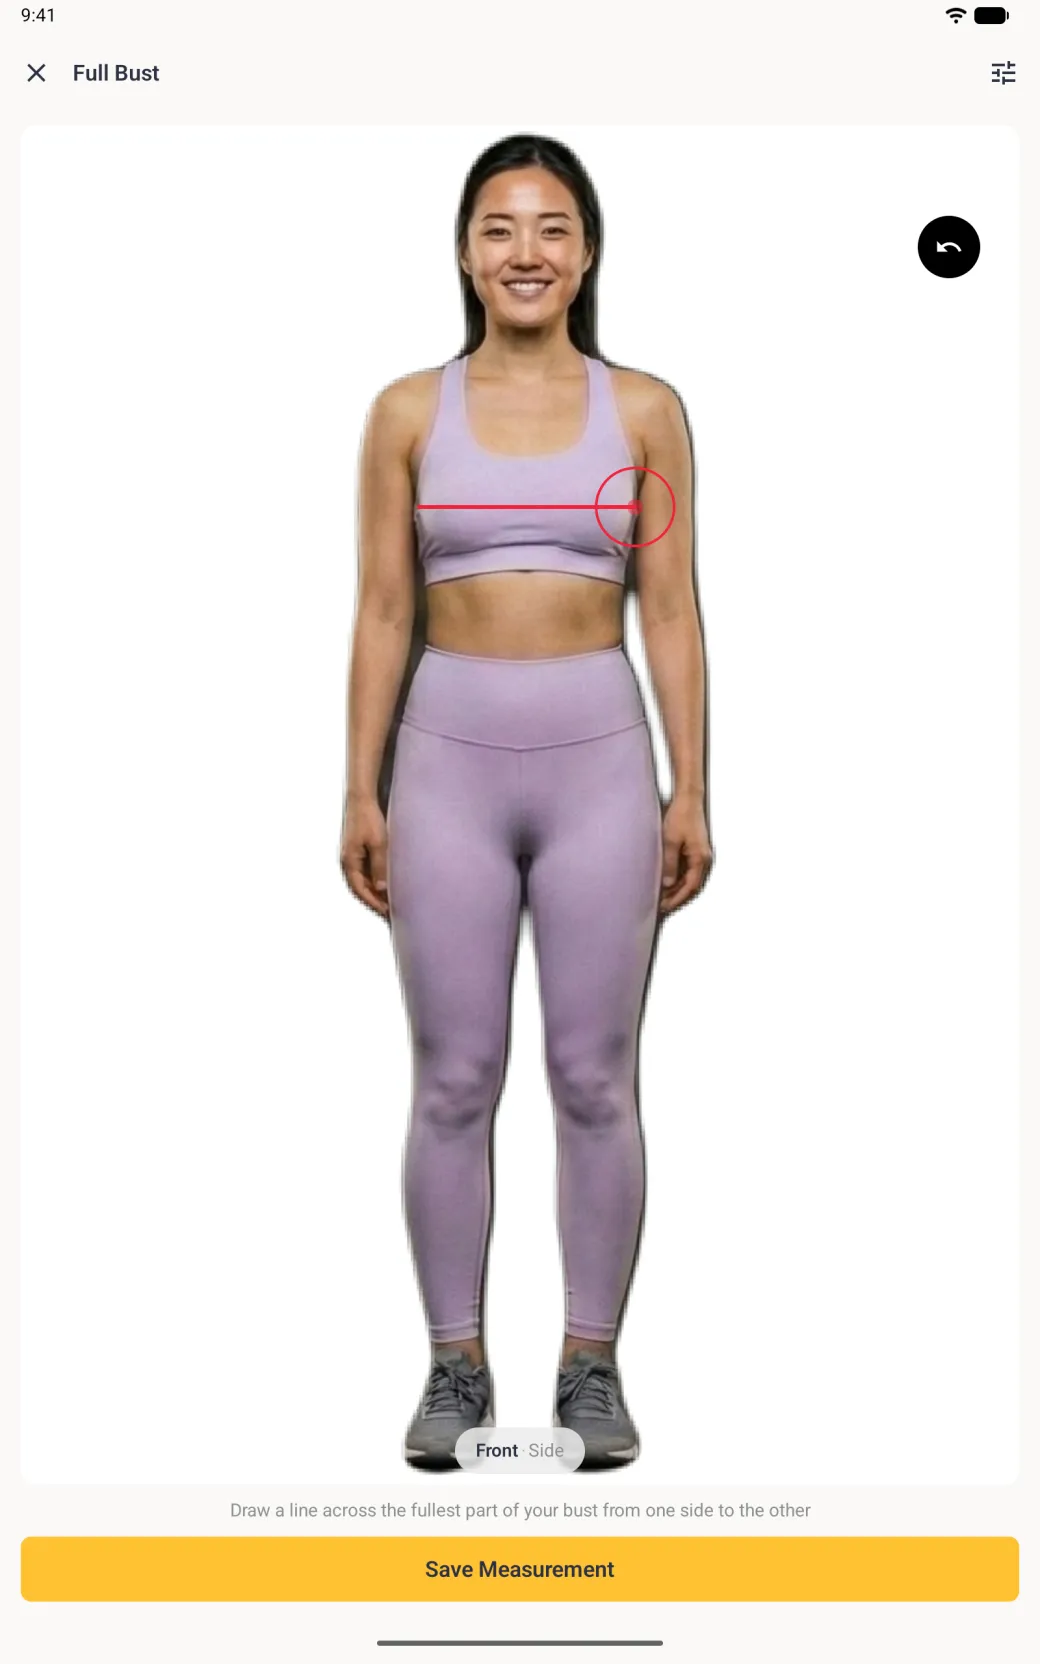
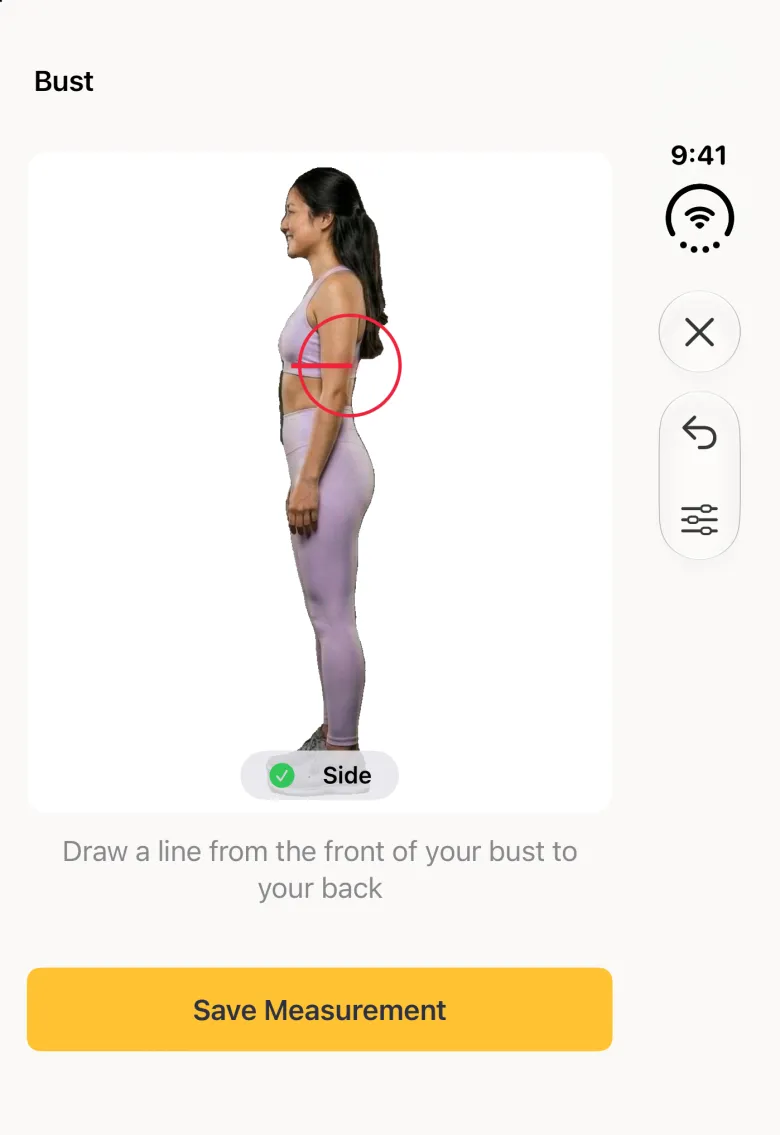
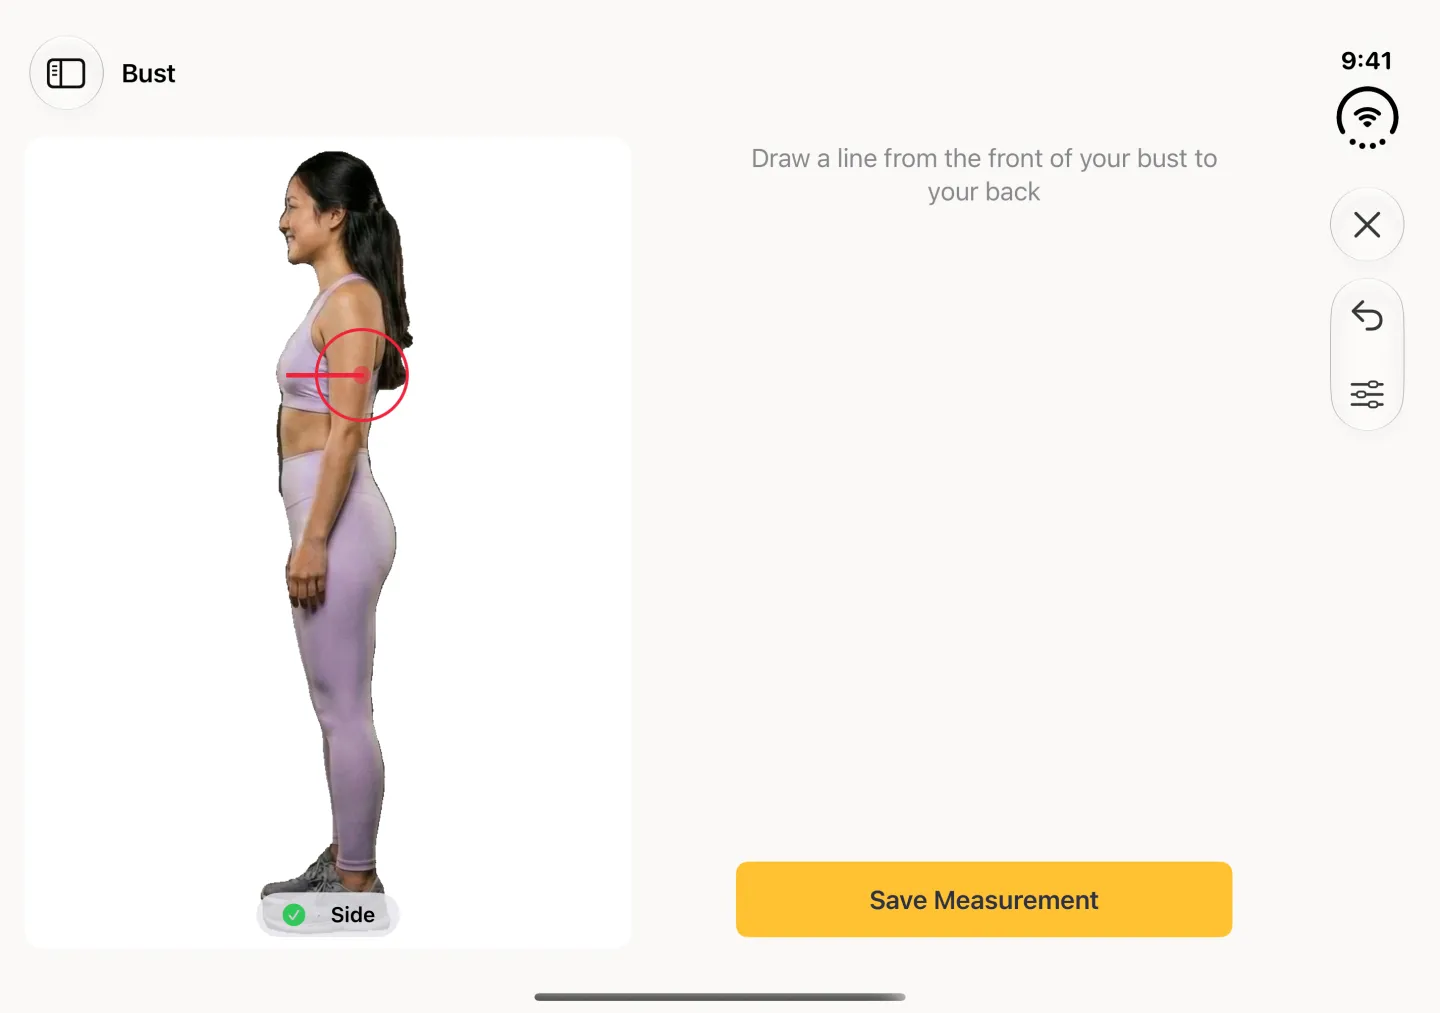
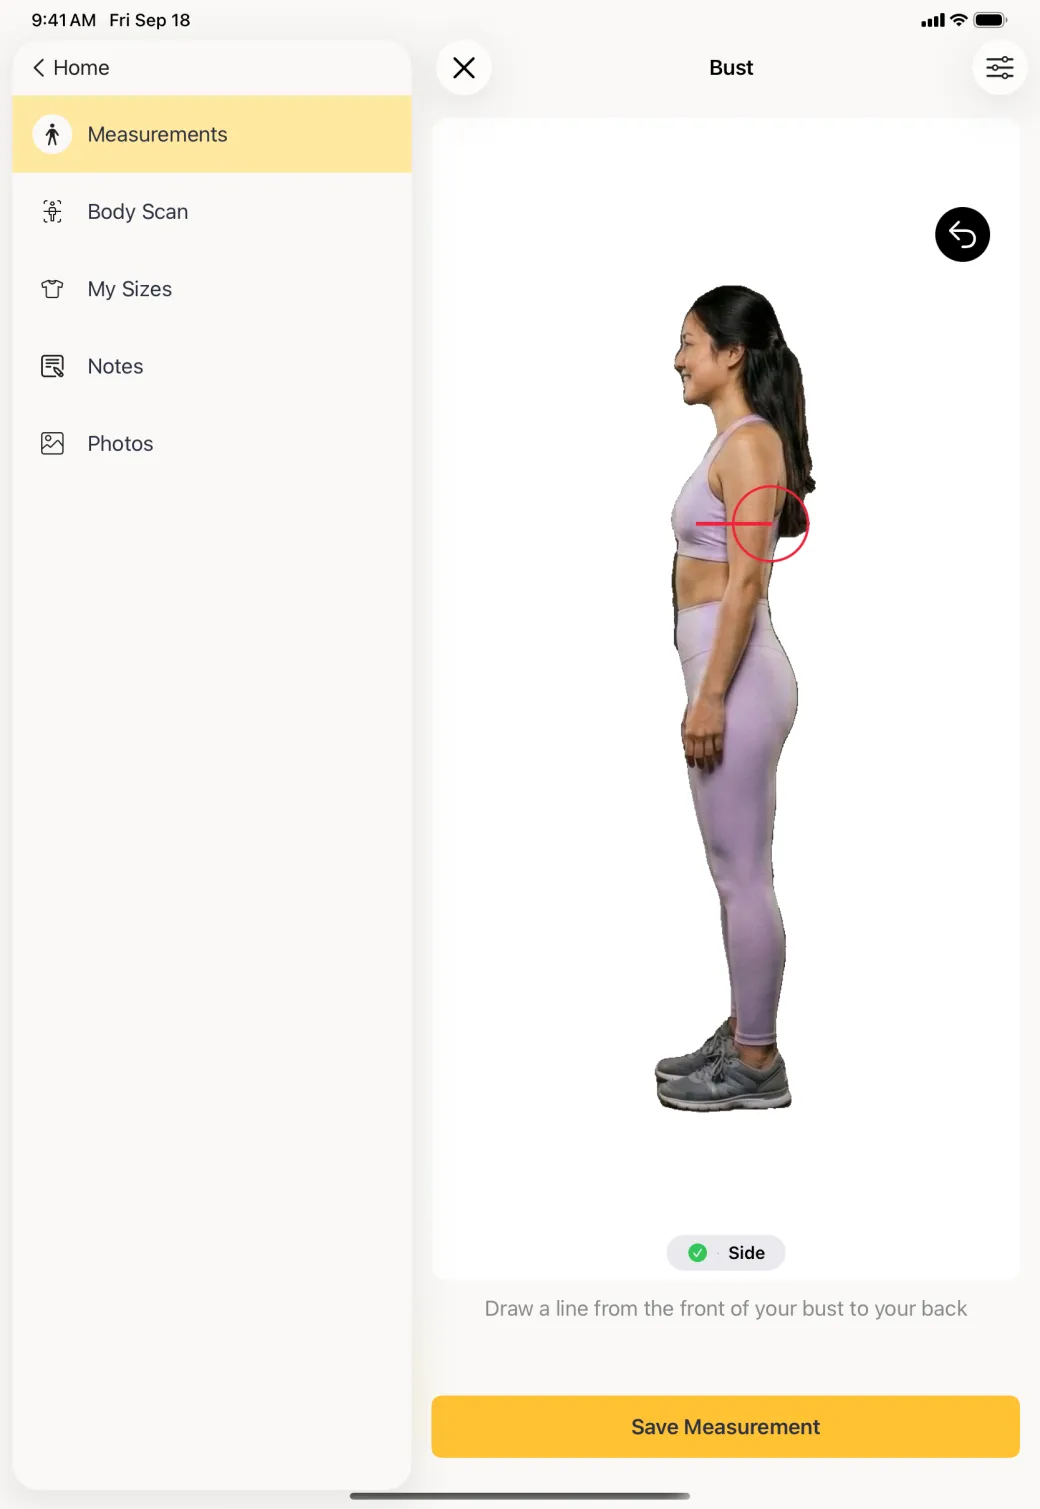
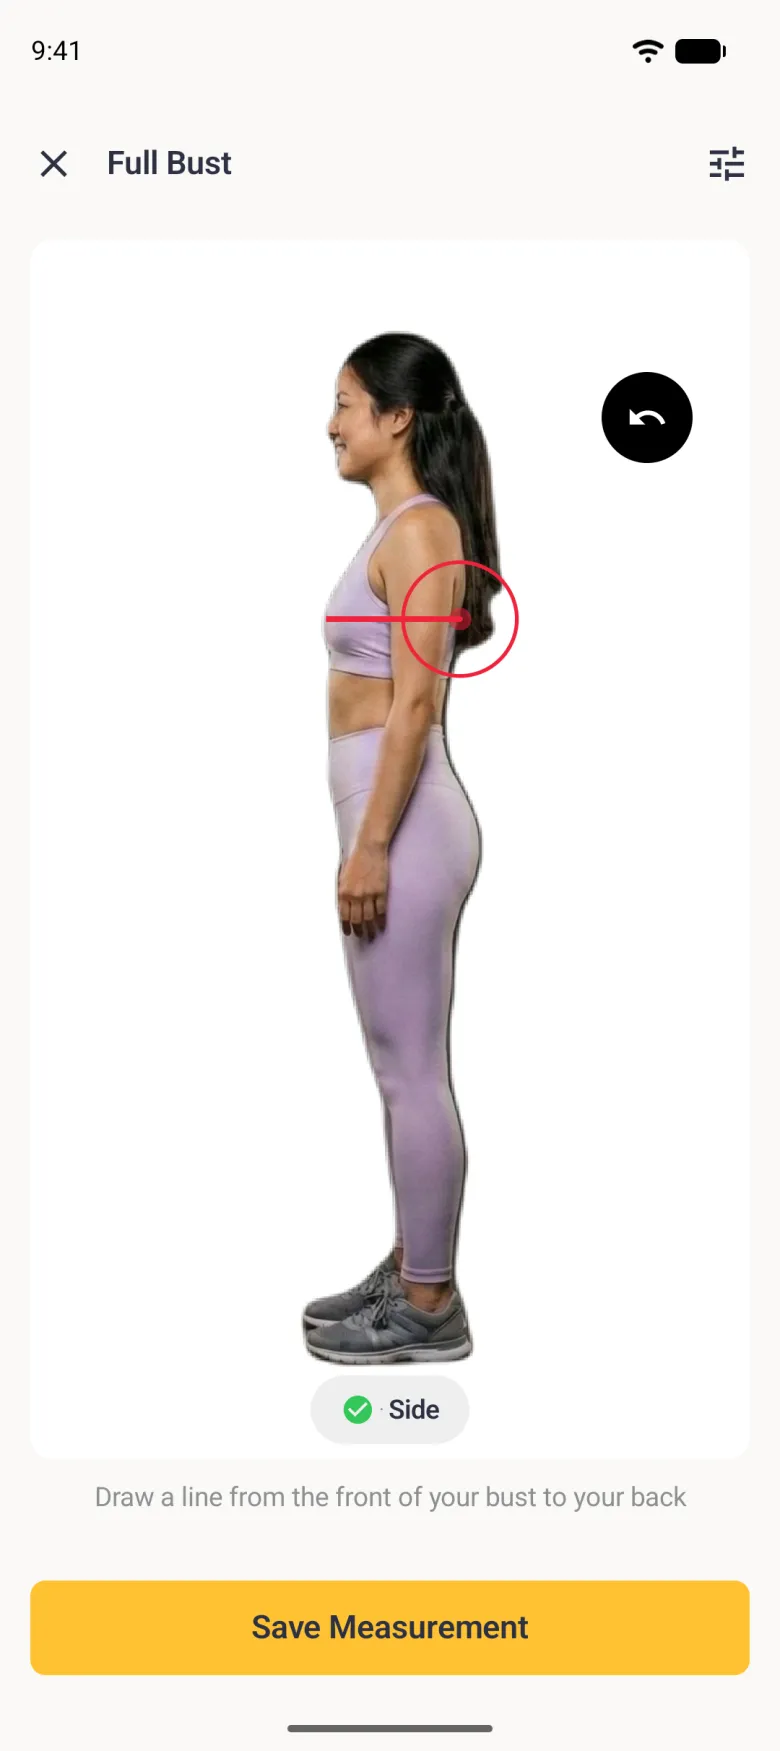
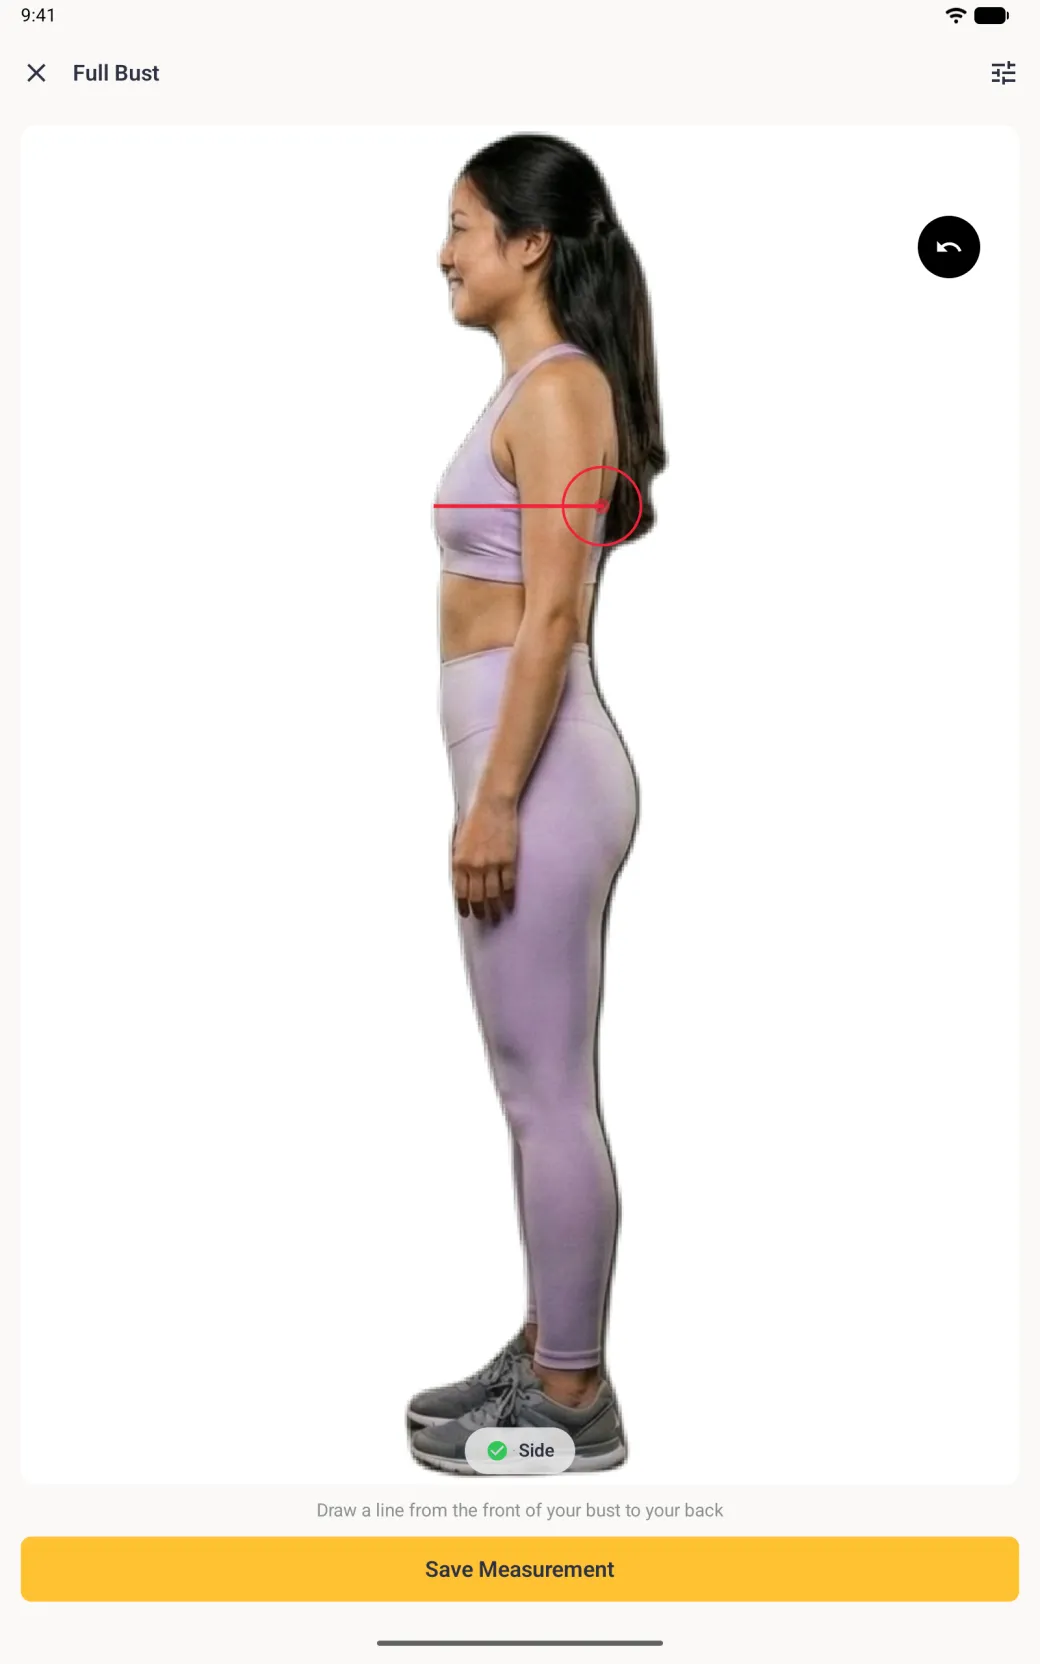
A circumference takes two lines: the width across the front photo and the depth across the side photo. The app puts the two together, so both have to be drawn end to end. This is a bust, and every other circumference works the same way.

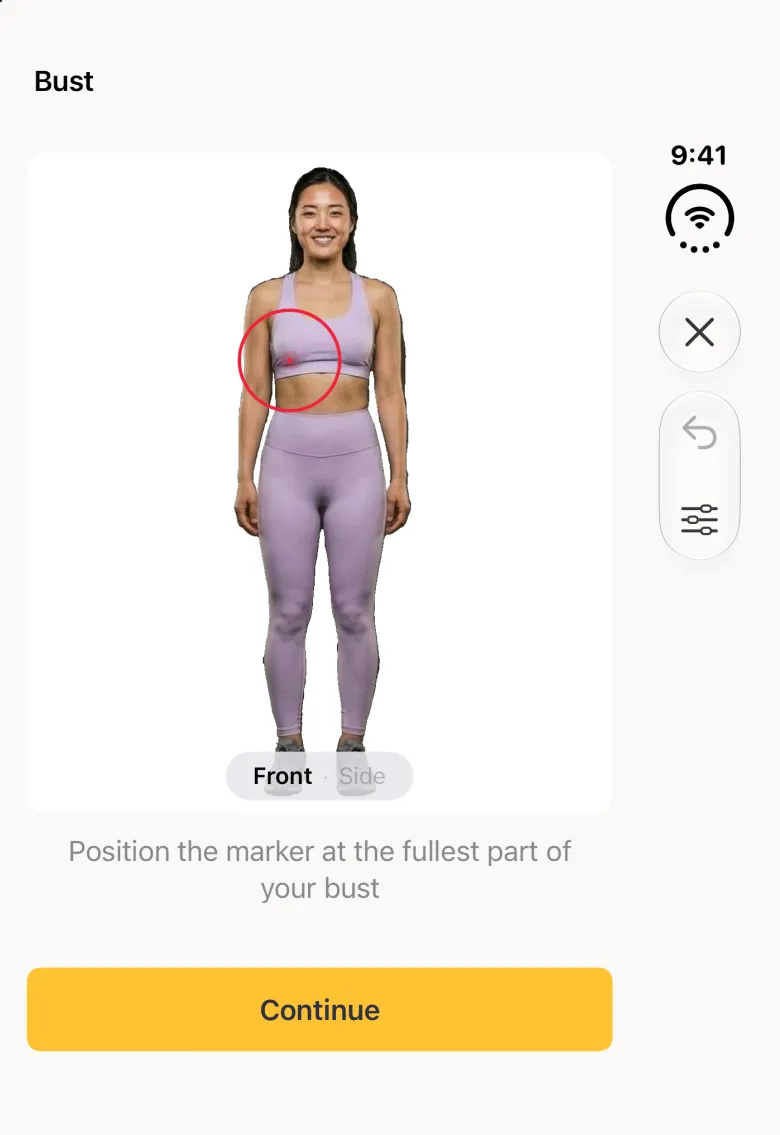
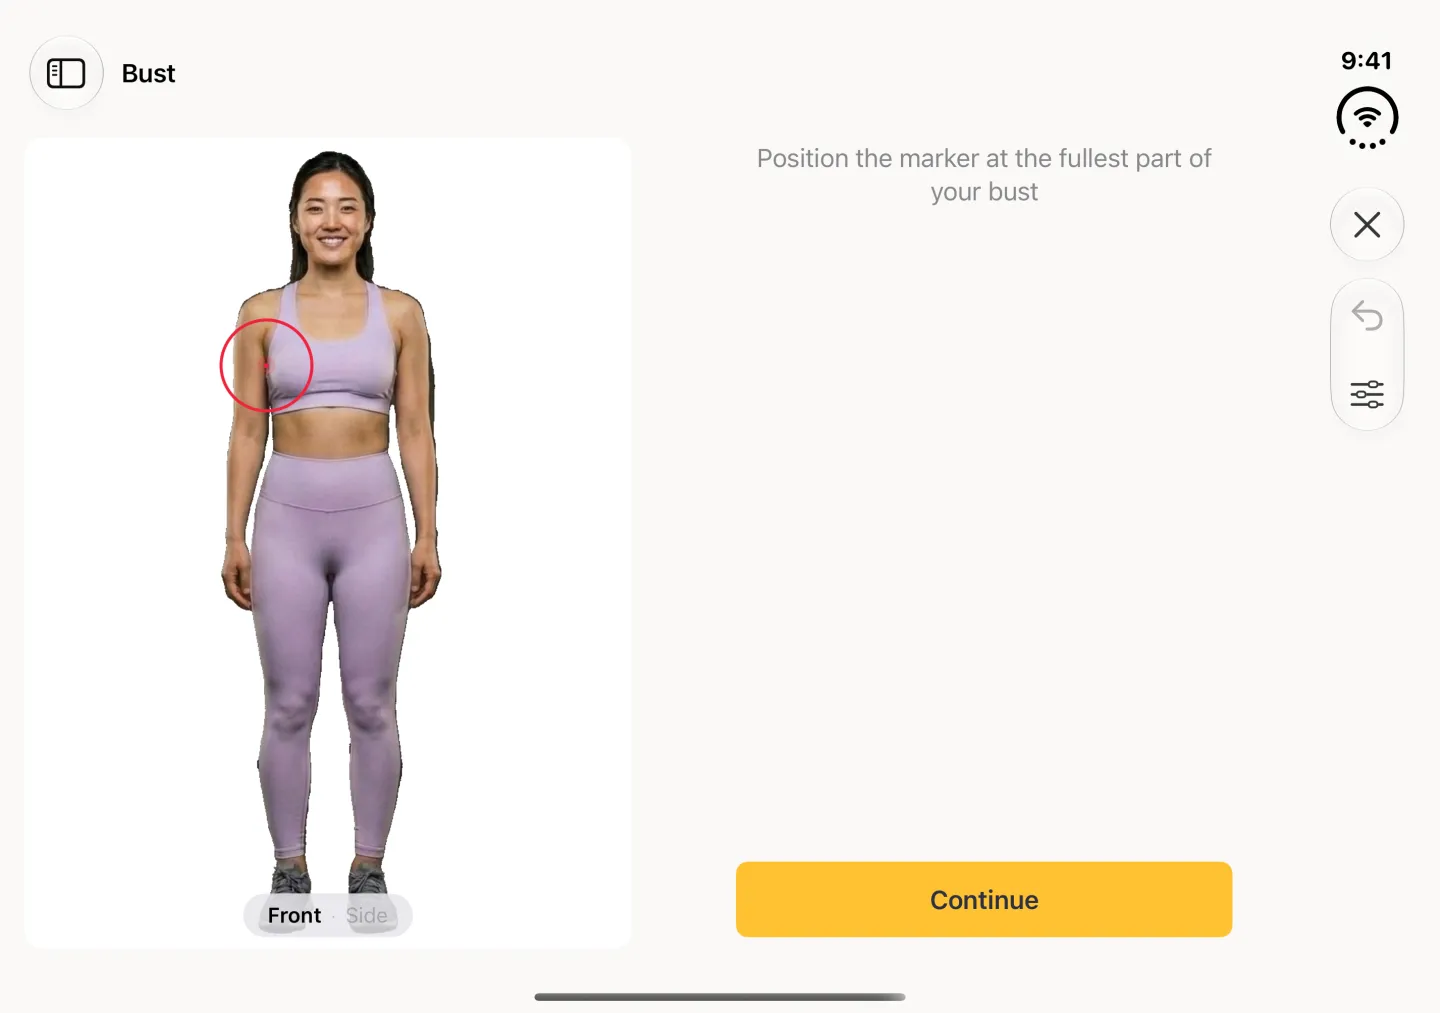
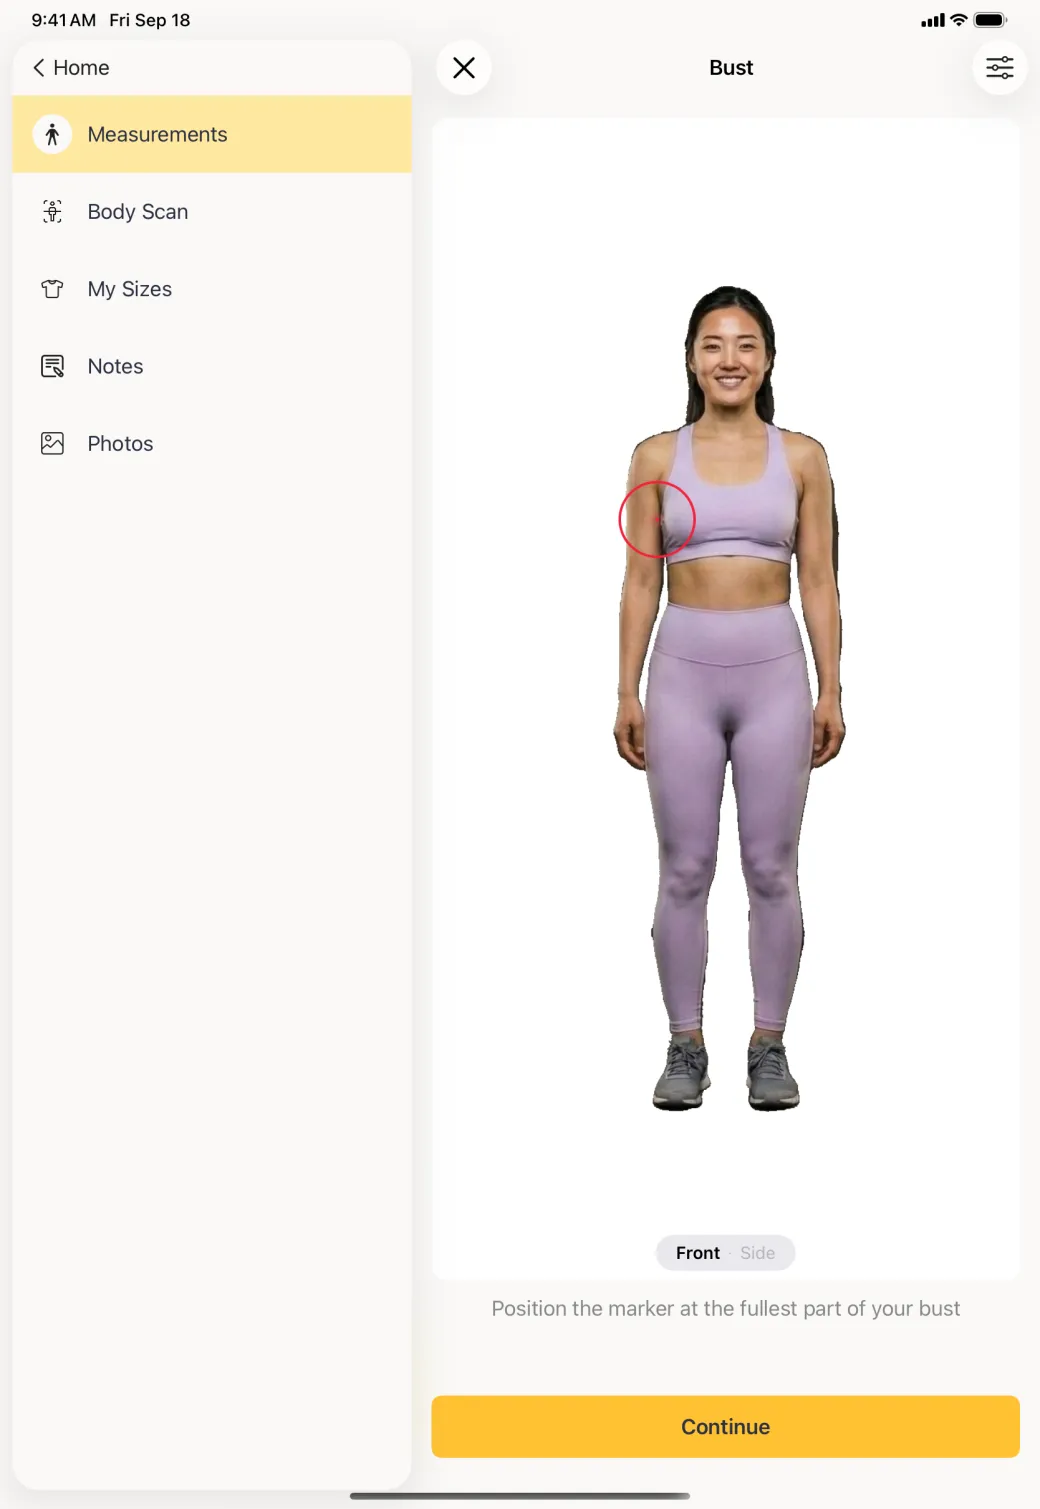
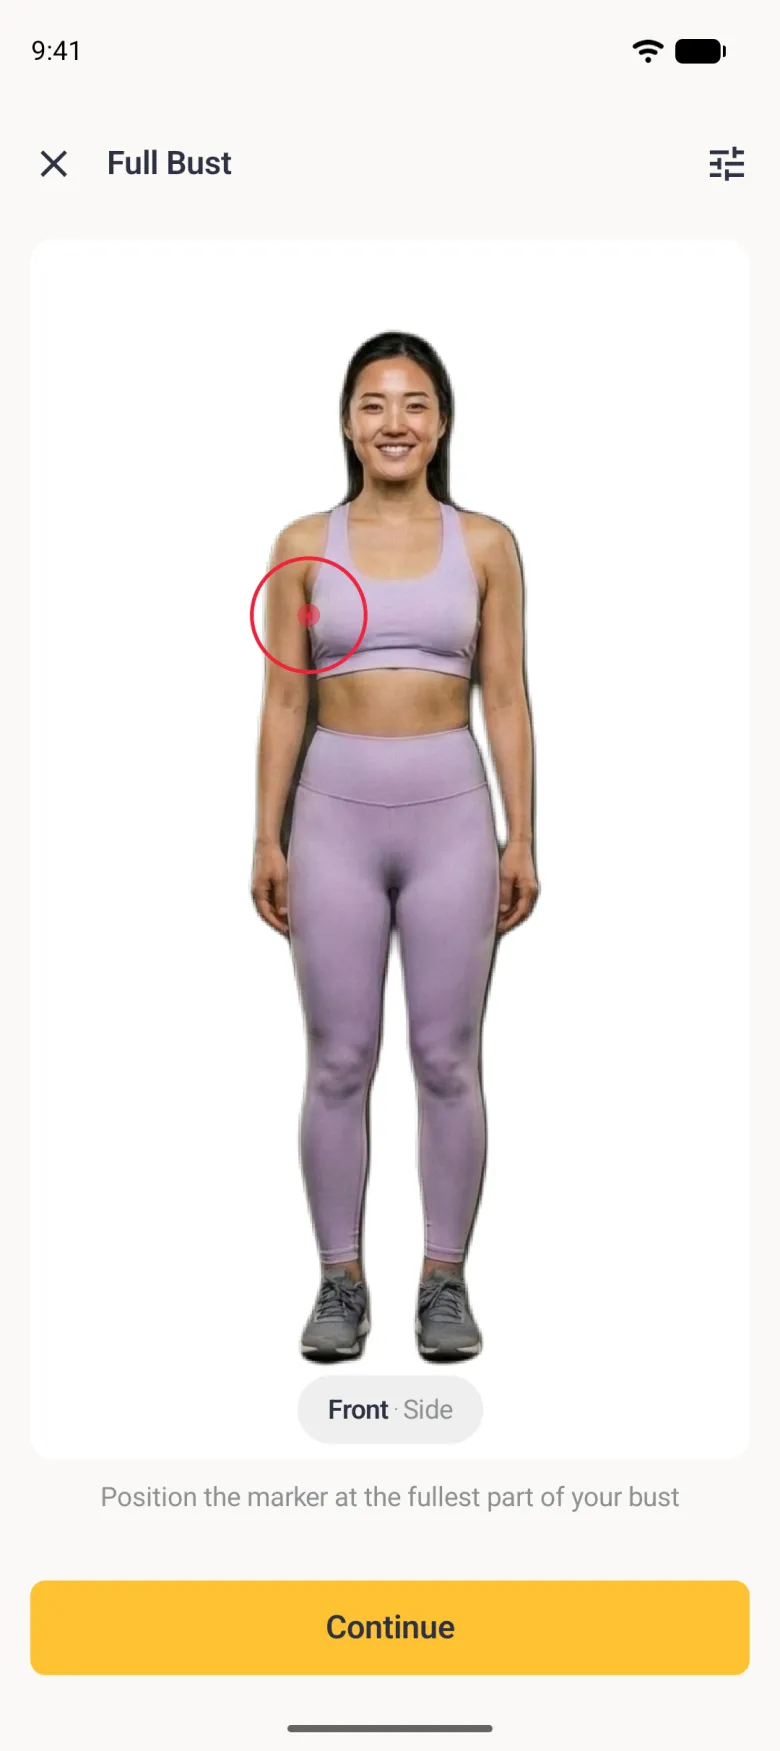
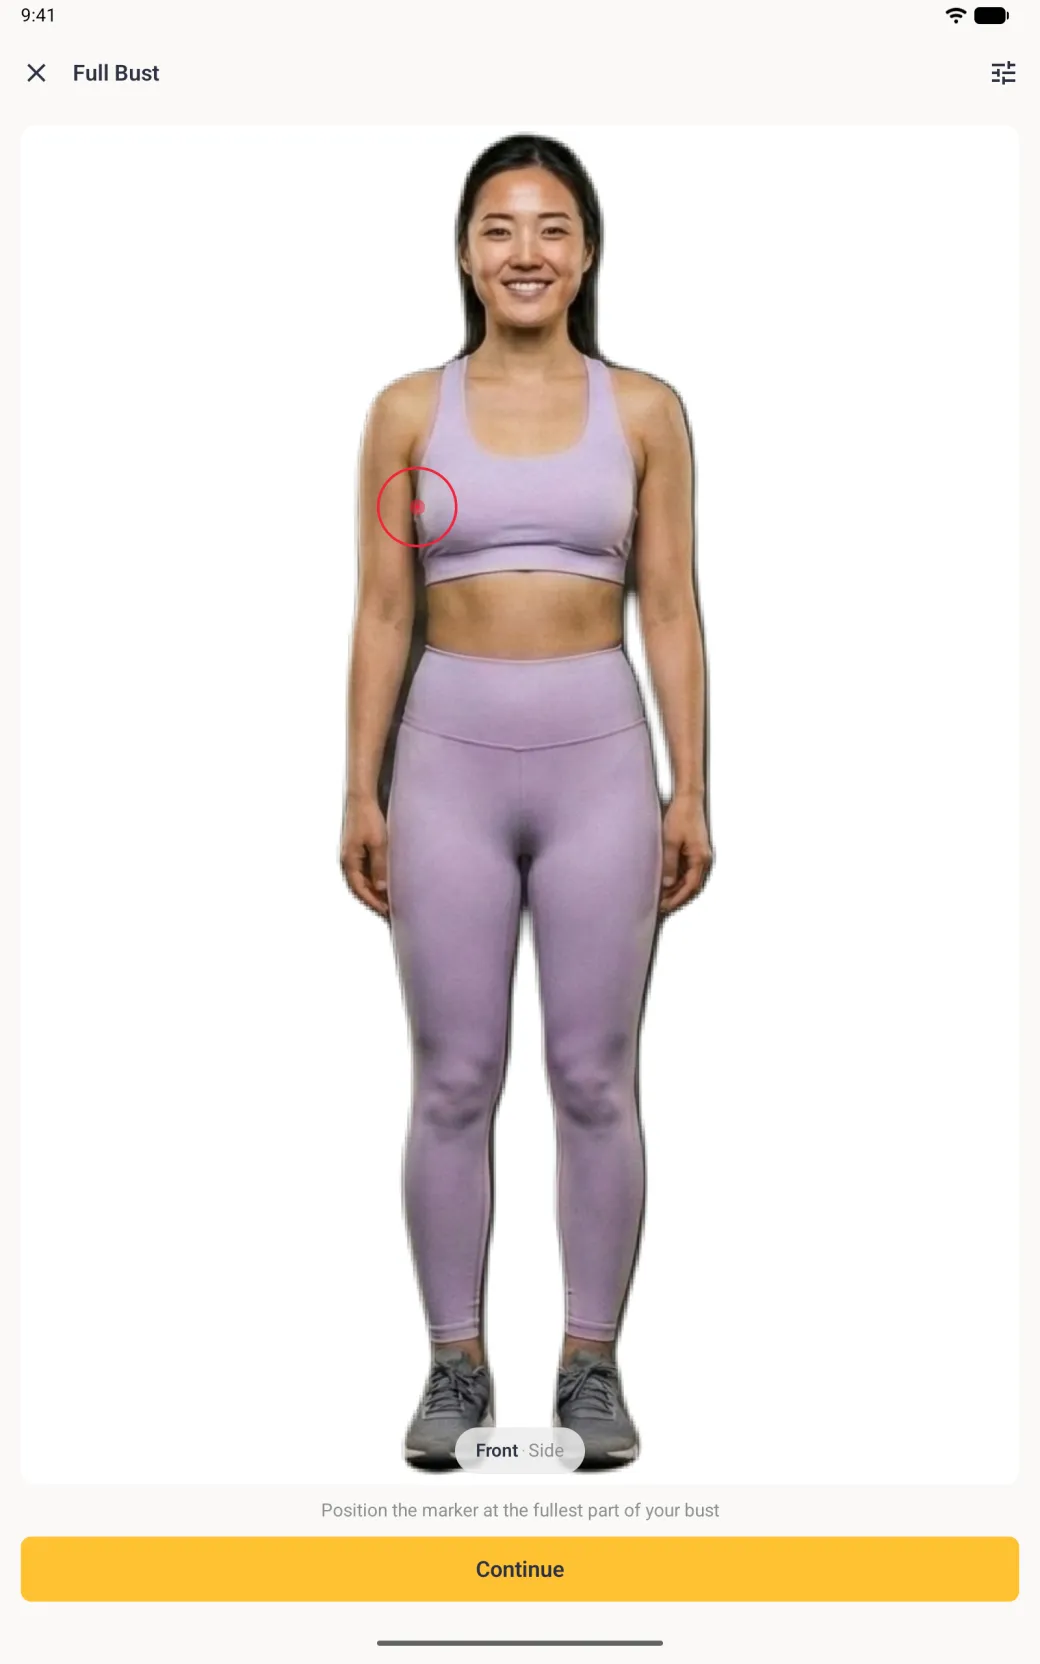
  1. Drag the red marker to the fullest part of the bust, at one side of the body, then tap Continue.
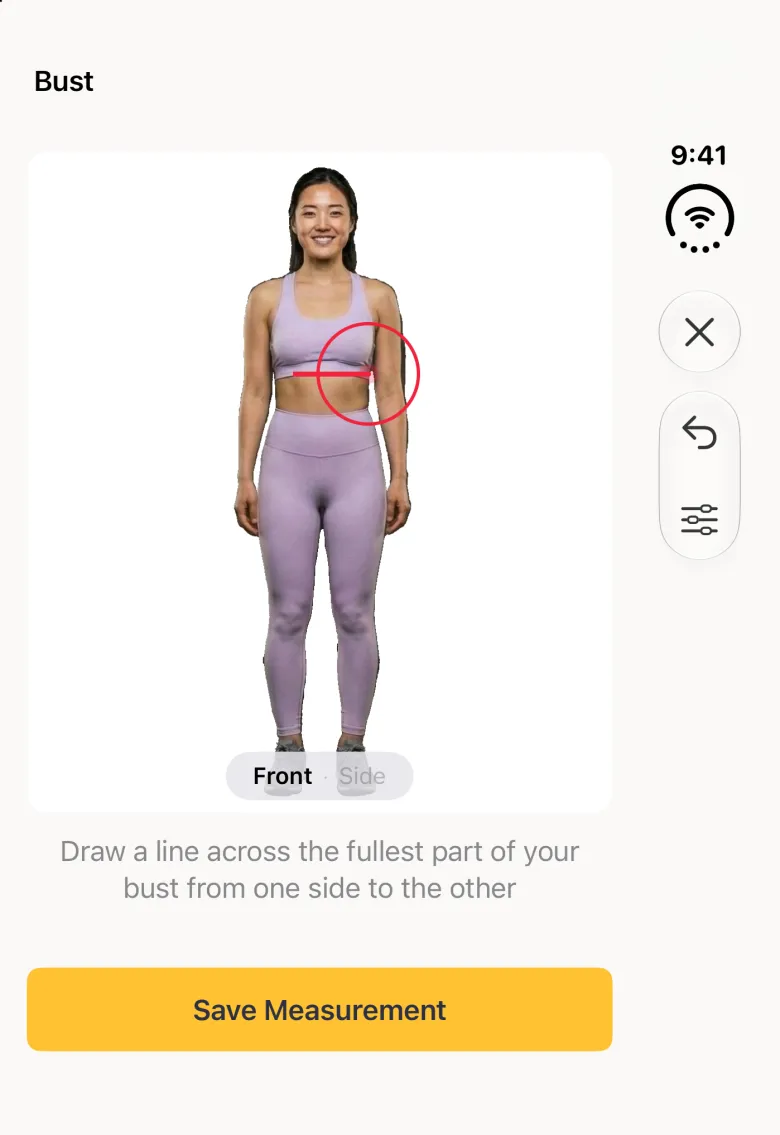
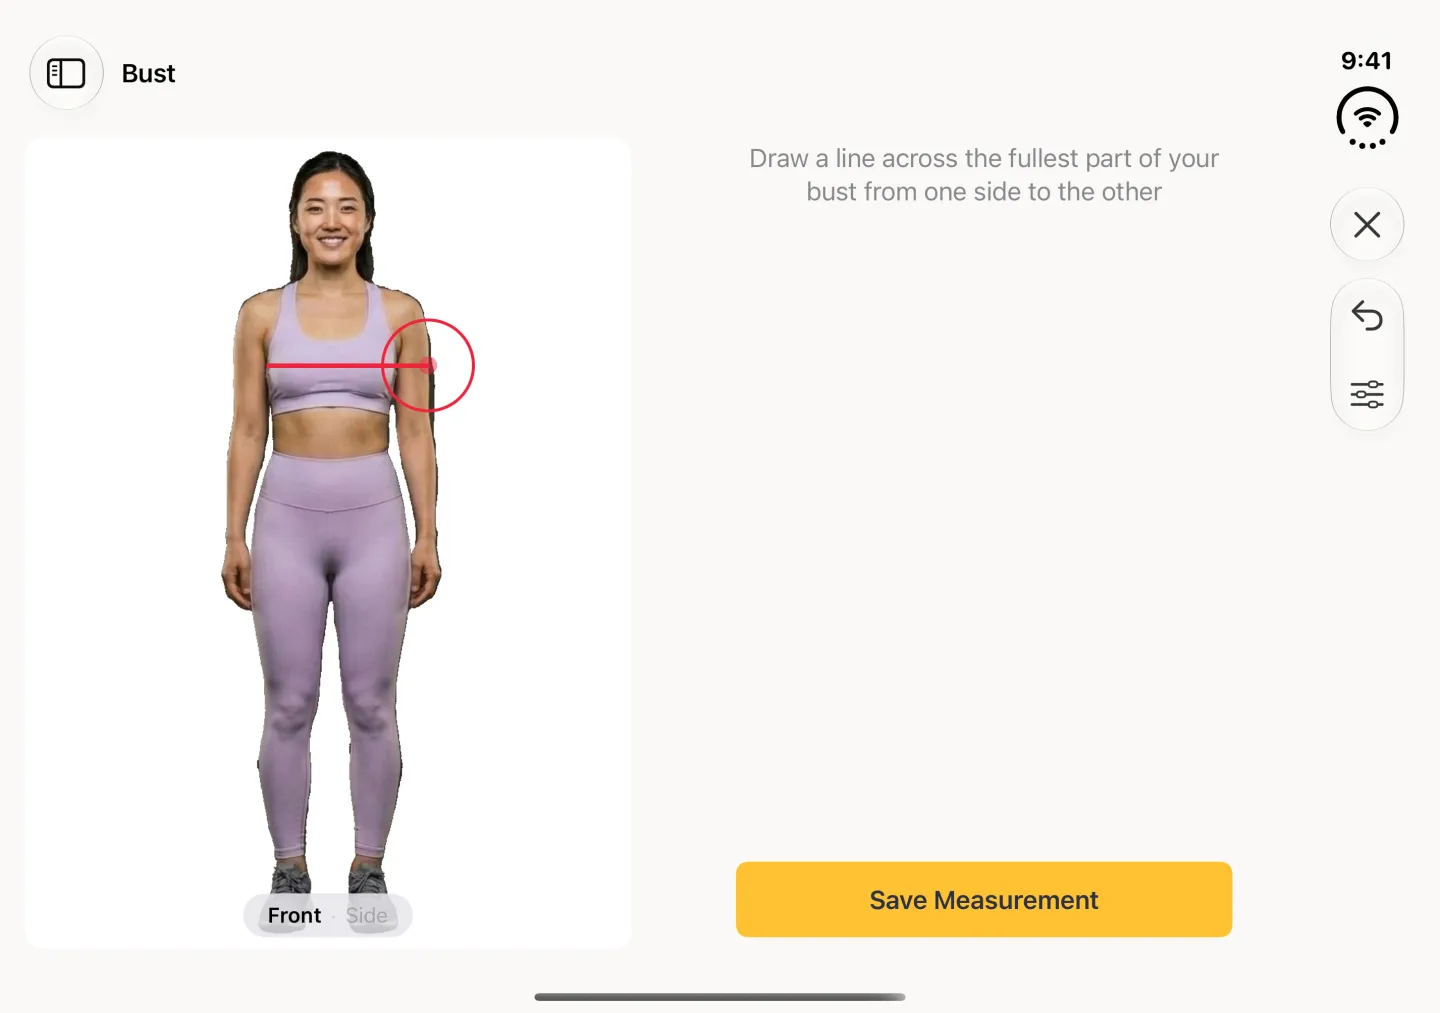
  2. Drag straight across the body to the other side. The line follows your finger and the instruction under the photo tells you what it expects.
  3. Tap Save Measurement, then Next Measurement. The view moves to the side photo and the word Front gets a green tick.
  4. Place the marker at the front of the bust, tap Continue, and draw straight back to the spine.
  5. Tap Save Measurement, then Done.

The value is worked out from the length of the lines, so accuracy matters more here than anywhere else in the app. A side line that stops short of the back returns a noticeably smaller number, which is the most common reason a result looks wrong.

Show these screens on
A front scan photo with a red target circle over one side of the bust, a Front and Side selector below the photo, and a Continue button.
A front scan photo in the pane beside the profile sidebar, with a red target circle over one side of the bust, a Front and Side selector below the photo, and a Continue button.
A front scan photo of a woman in a lilac sports top and leggings on a white card, with a red target circle over the left side of her bust, a Front and Side pill below the photo, the instruction Position the marker at the fullest part of your bust and a yellow Continue button.
A front scan photo of a woman in a lilac sports top and leggings filling a white card, with a red target circle at the left side of her bust, a Front · Side pill at the foot of the photo, the instruction Position the marker at the fullest part of your bust and a yellow Continue button.
Drag the marker to where the measurement starts.
The front scan photo with a straight red line drawn horizontally across the whole width of the chest at bust level.
The front scan photo with a straight red line drawn horizontally across the whole width of the chest at bust level, above the instruction to draw from one side to the other.
The front scan photo with a straight red line drawn horizontally across the full width of the chest at bust level, ending in a red target circle, a round undo button at the upper right of the card, and the instruction Draw a line across the fullest part of your bust from one side to the other above a yellow Save Measurement button.
Draw the full width, not half of it.
A side profile scan photo with a horizontal red line drawn from the front of the bust through to the back.
A side profile scan photo in the pane beside the profile sidebar, with a horizontal red line drawn from the front of the bust through to the back.
A side profile scan photo of the woman facing left, with a horizontal red line drawn from the front of her bust through to her back and a red target circle at the back, the Side pill with a green tick, and the instruction Draw a line from the front of your bust to your back.
The side photo supplies the depth from front to back.
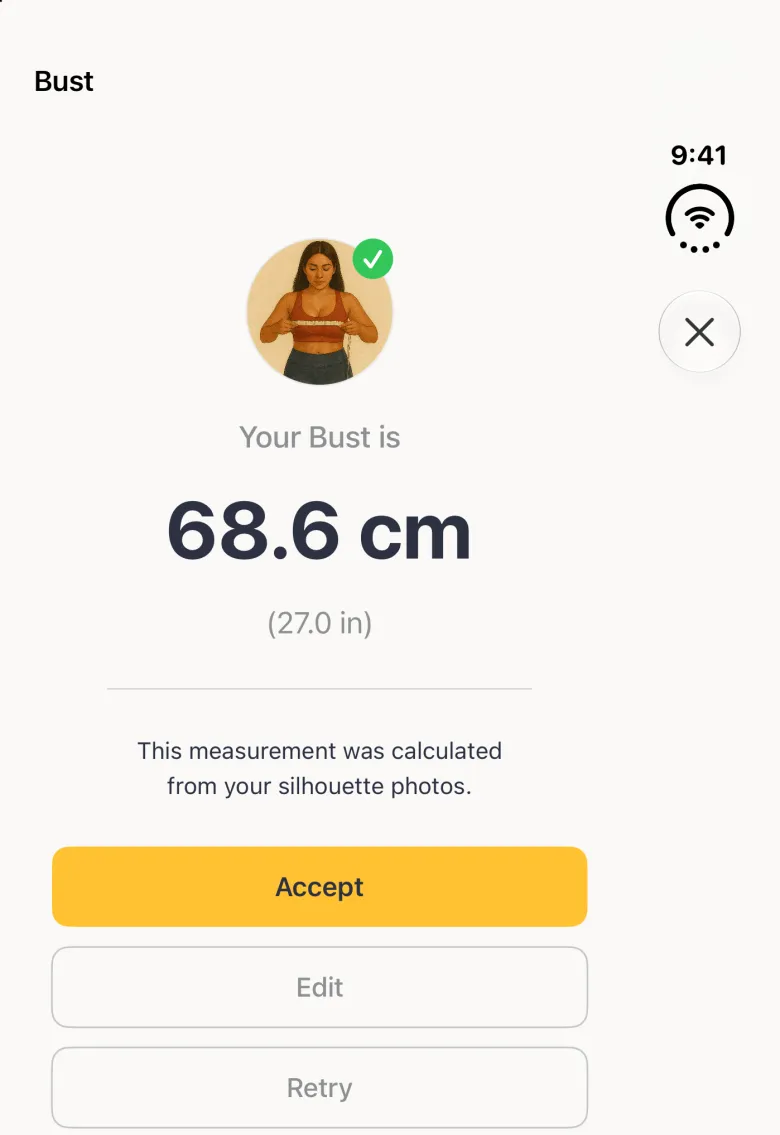
A result screen reading Your Bust is 94.6 cm with 37.2 in below, a note that it was calculated from the silhouette photos, and Accept, Edit and Retry buttons.
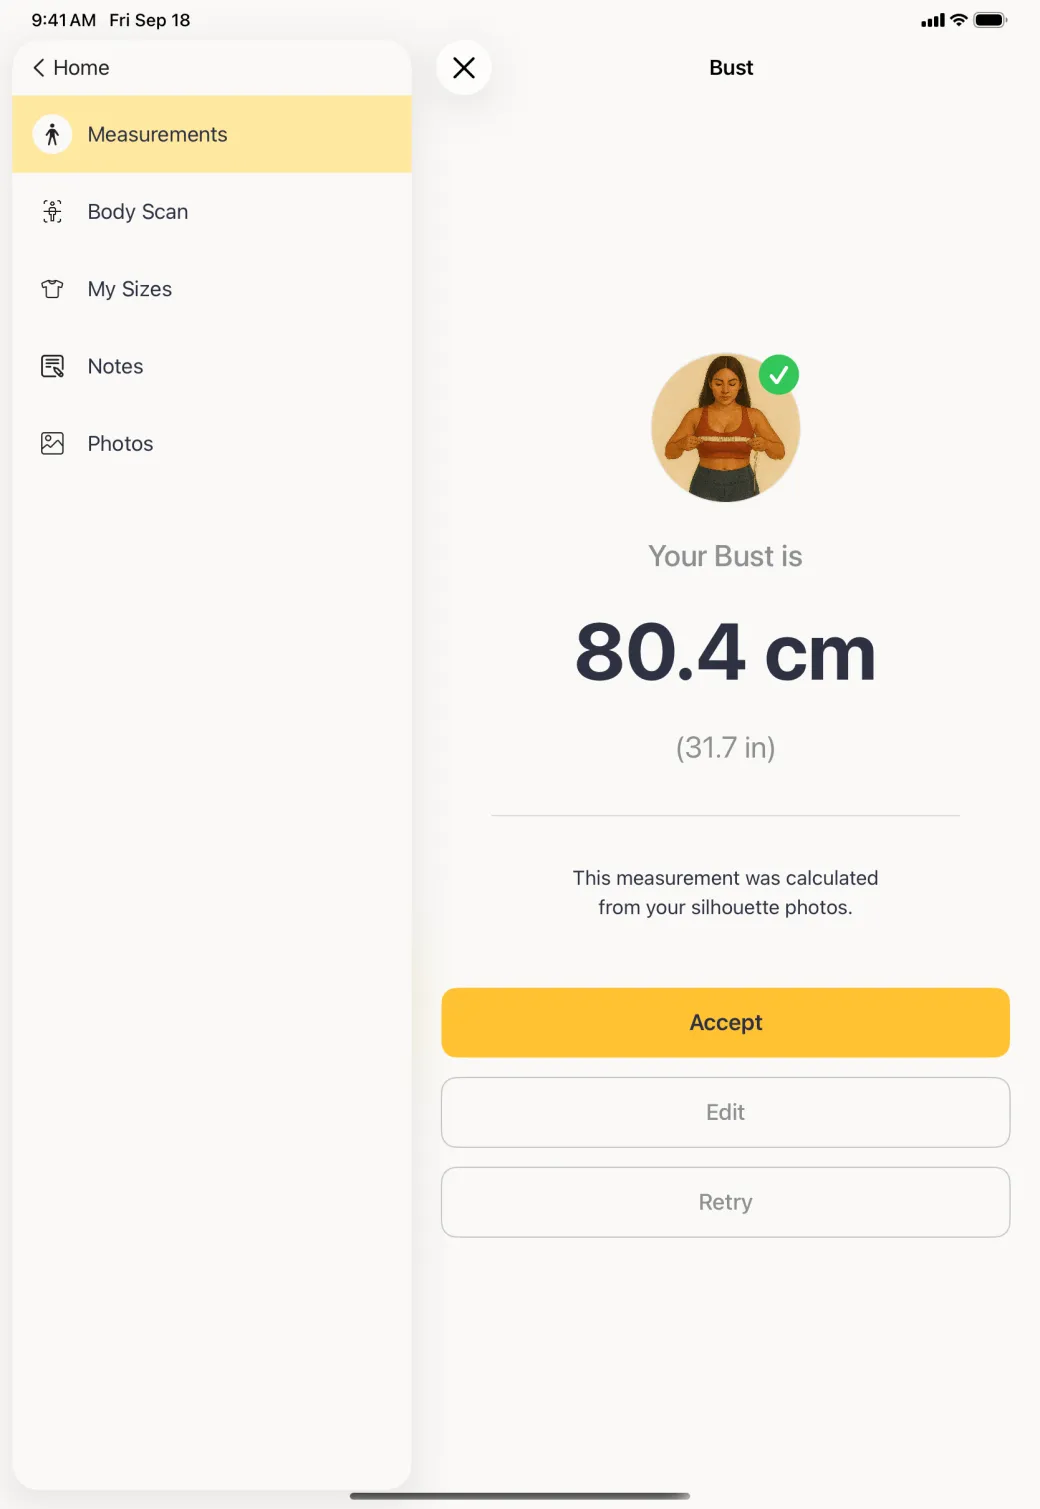
A result screen reading Your Bust is 80.4 cm with 31.7 in below, a note that it was calculated from the silhouette photos, and Accept, Edit and Retry buttons.
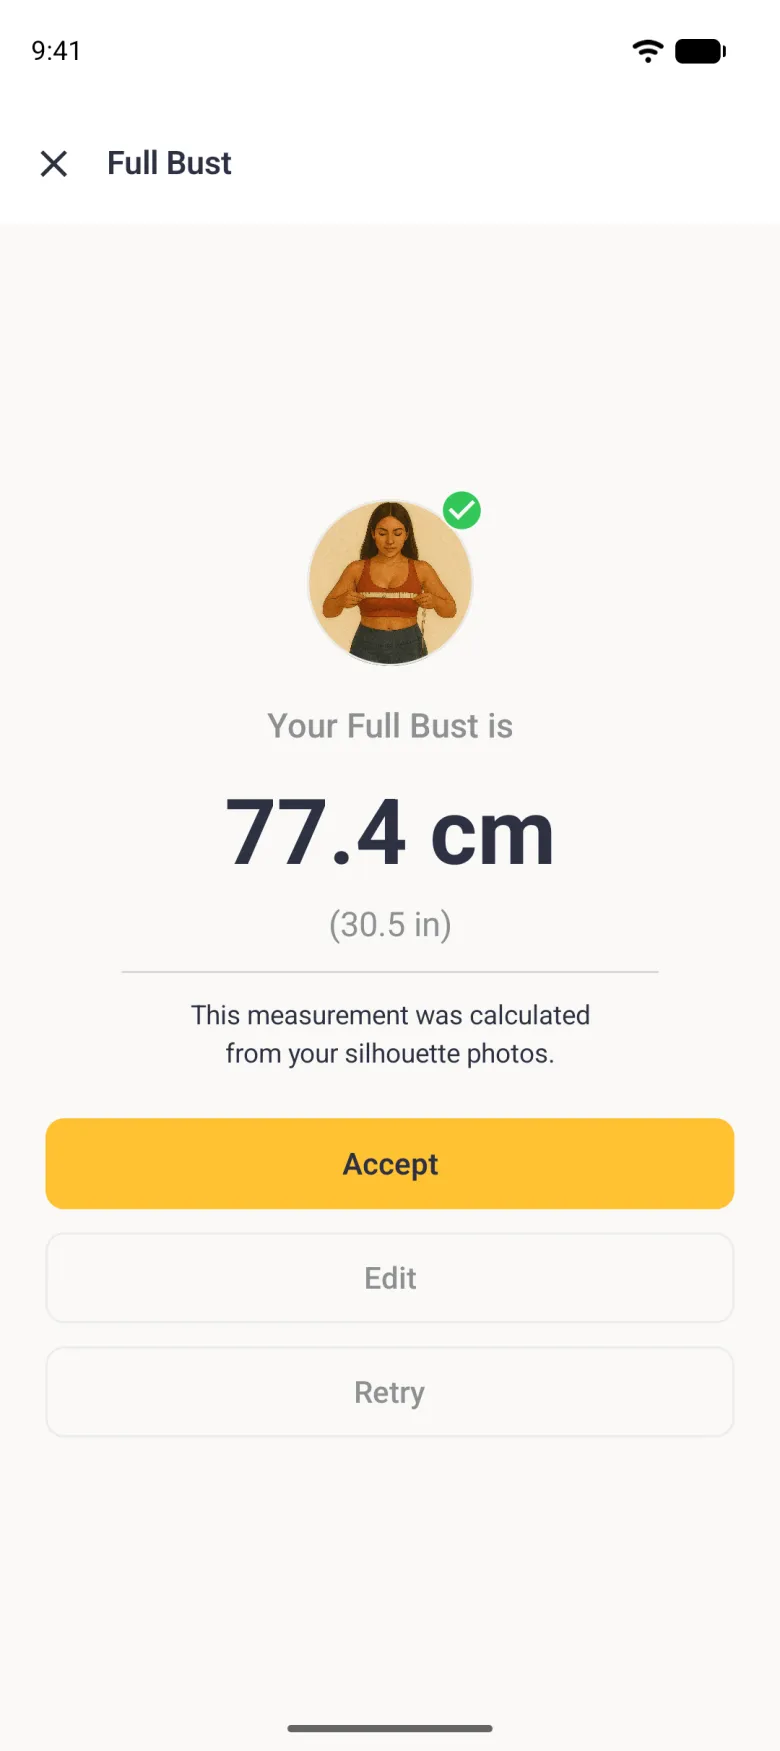
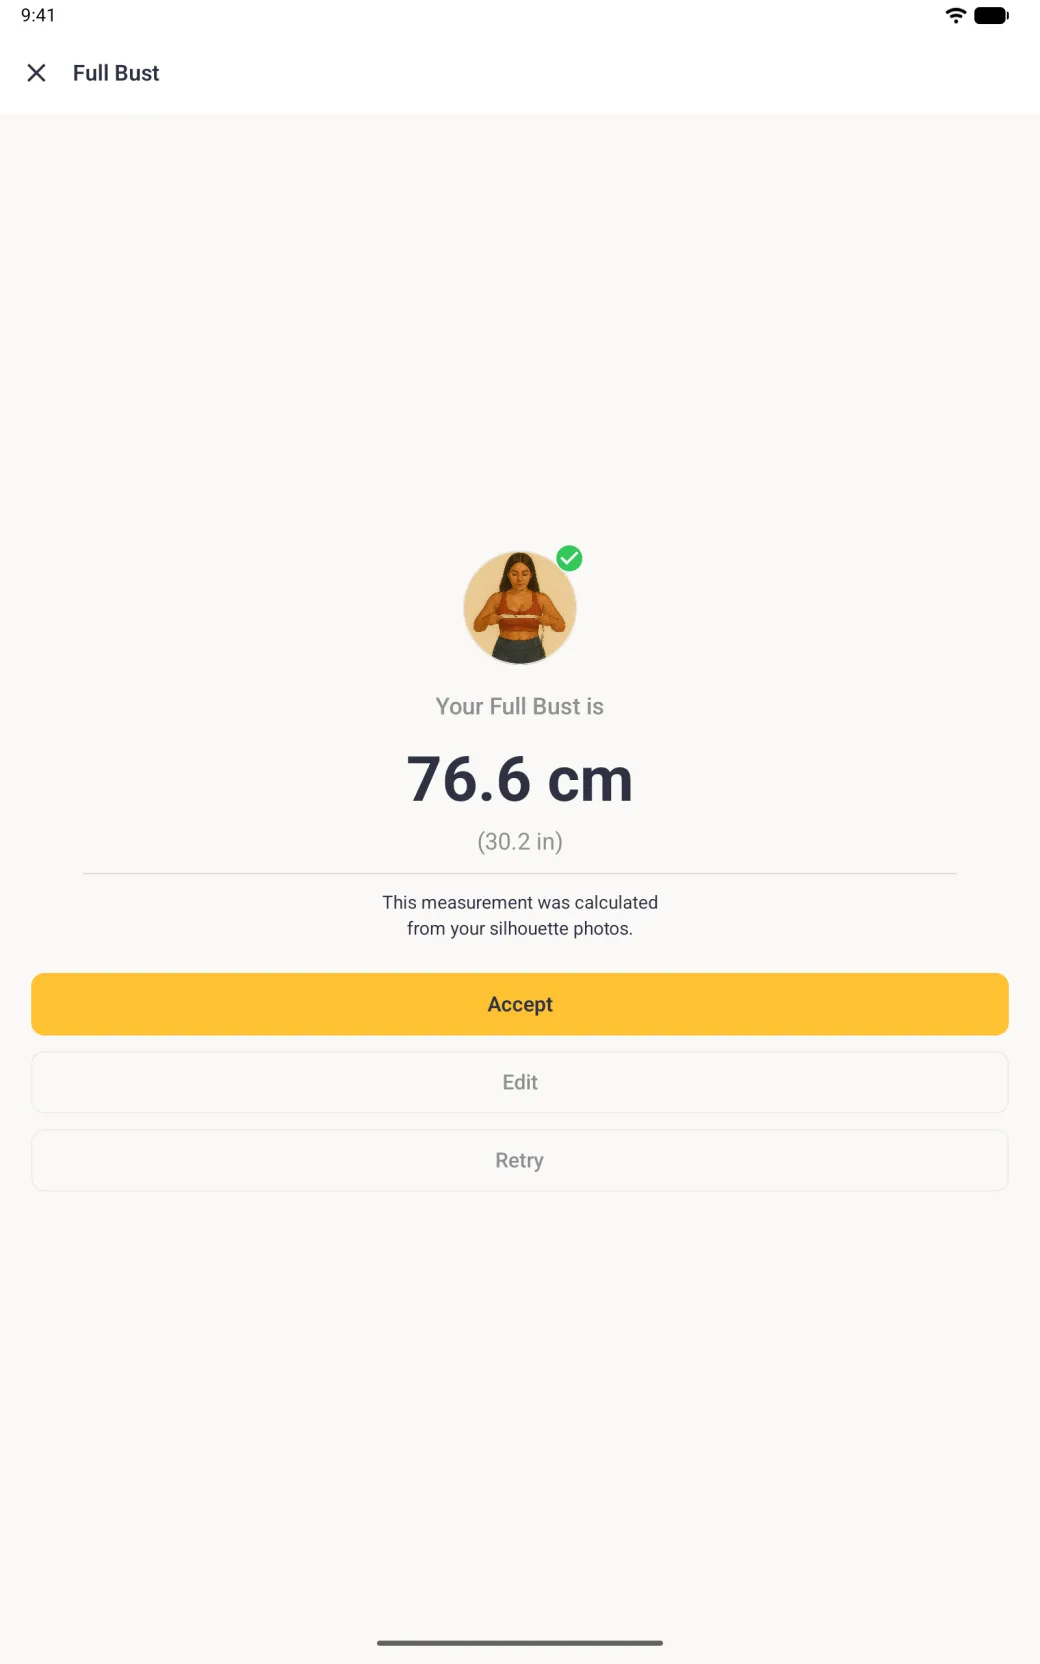
A Full Bust result screen with a round bust illustration and a green tick, reading Your Full Bust is 77.4 cm with 30.5 in below, a note that it was calculated from your silhouette photos, and a gold Accept button above outlined Edit and Retry buttons.
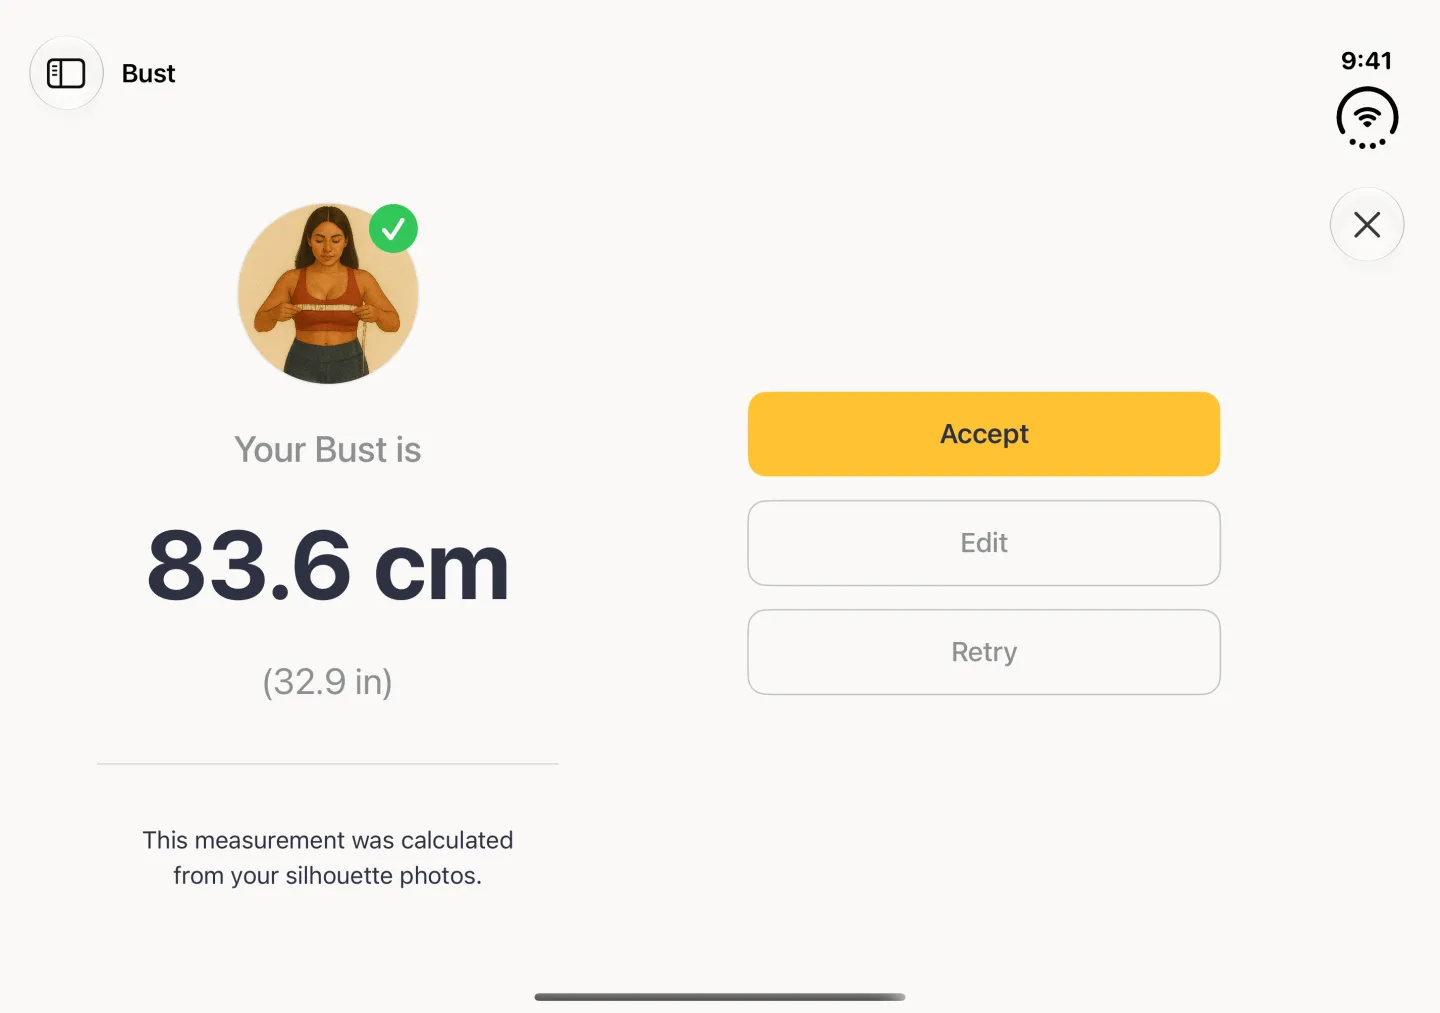
A Full Bust result screen centred on the tablet with a round bust illustration and a green tick, reading Your Full Bust is followed by the calculated value in centimetres with one decimal and the inch value in brackets, a note that it was calculated from your silhouette photos, and a full-width gold Accept button above outlined Edit and Retry buttons.
Two lines become one circumference.

What happens when I accept the value?

Accept saves the number to the profile like any tape measurement, and the label on the body updates. The result screen also offers Edit and Retry, so a number that looks wrong never has to be saved.

Because centimetres are shown as whole numbers, the value you accept appears on the body rounded to the nearest whole centimetre. The stored value keeps its decimal.

Show these screens on
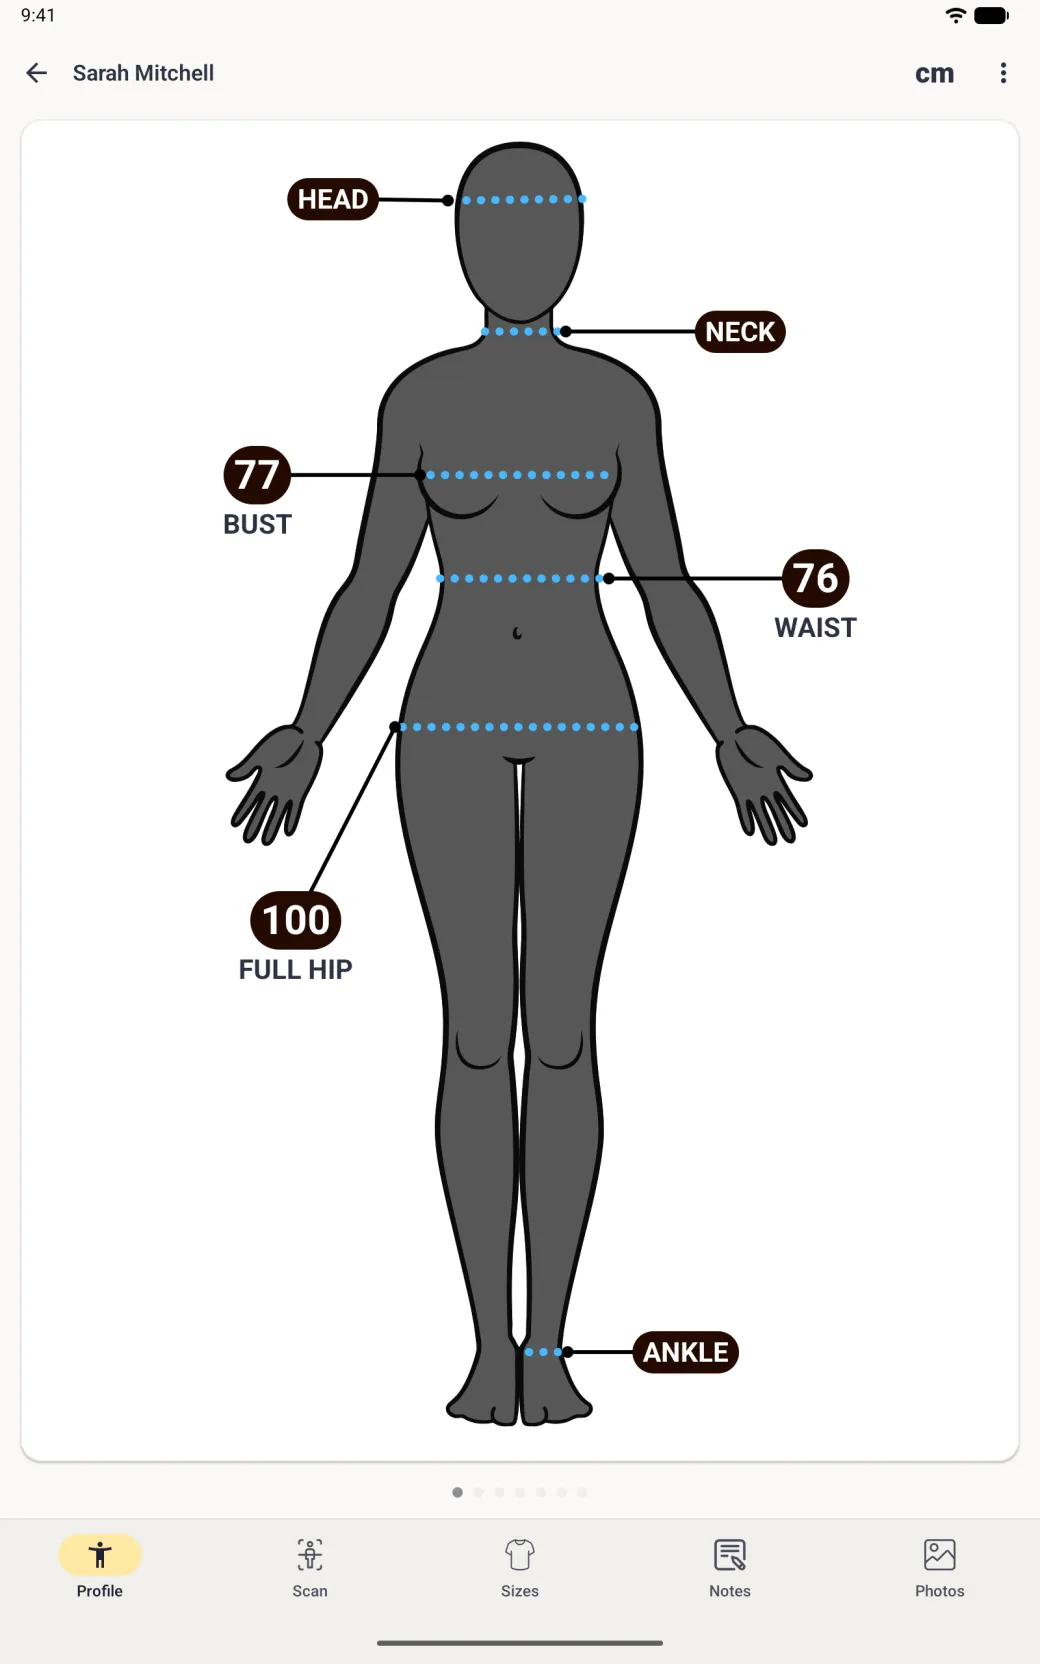
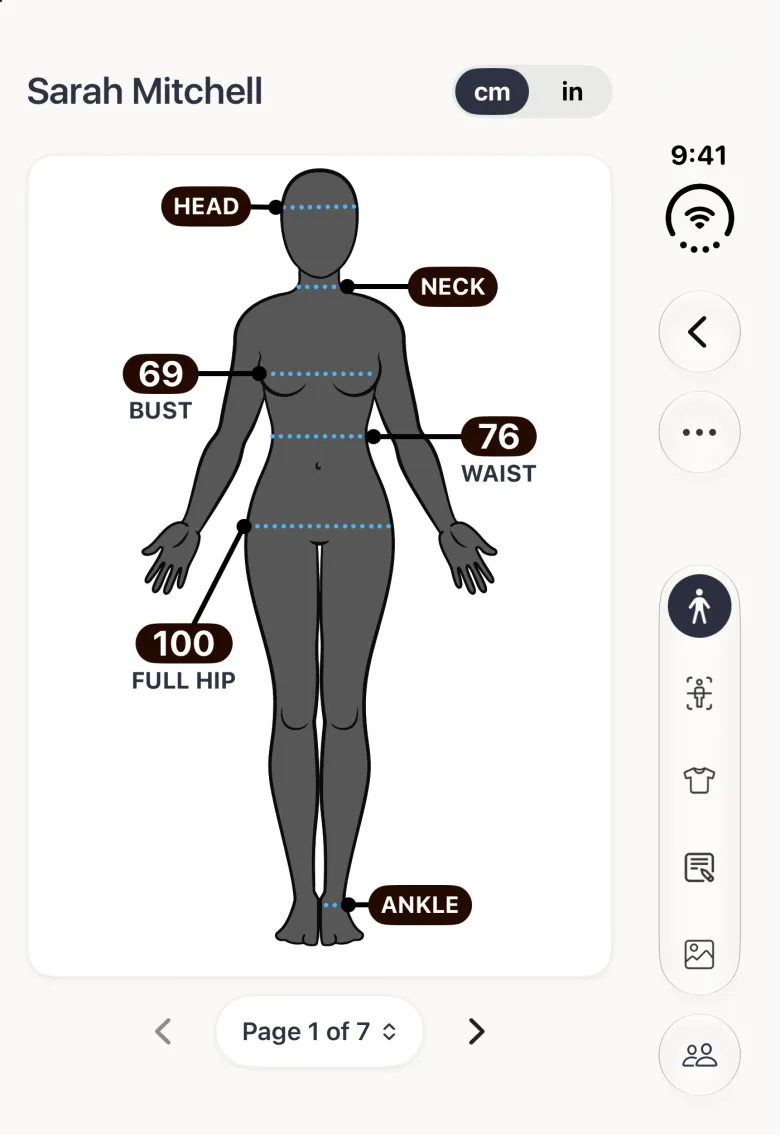
A profile body with the Bust label now reading 95 next to unchanged Head, Neck, Waist 76, Full Hip 100 and Ankle labels.
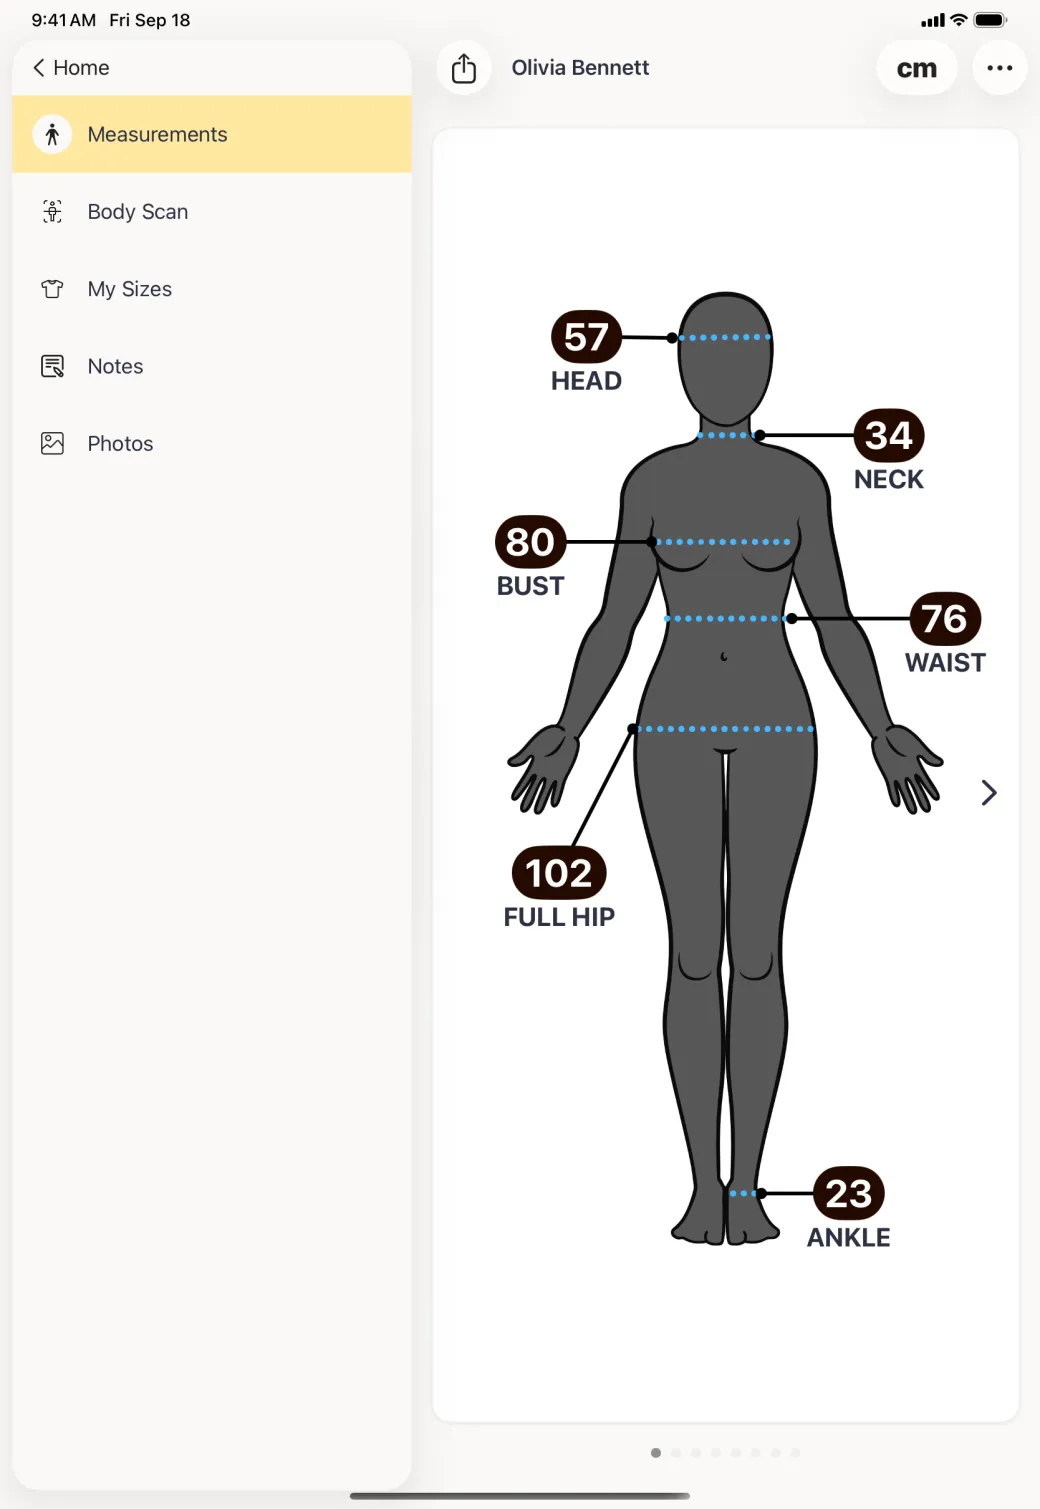
A profile body with the Bust label now reading 80 next to unchanged Head, Neck, Waist, Full Hip and Ankle labels.
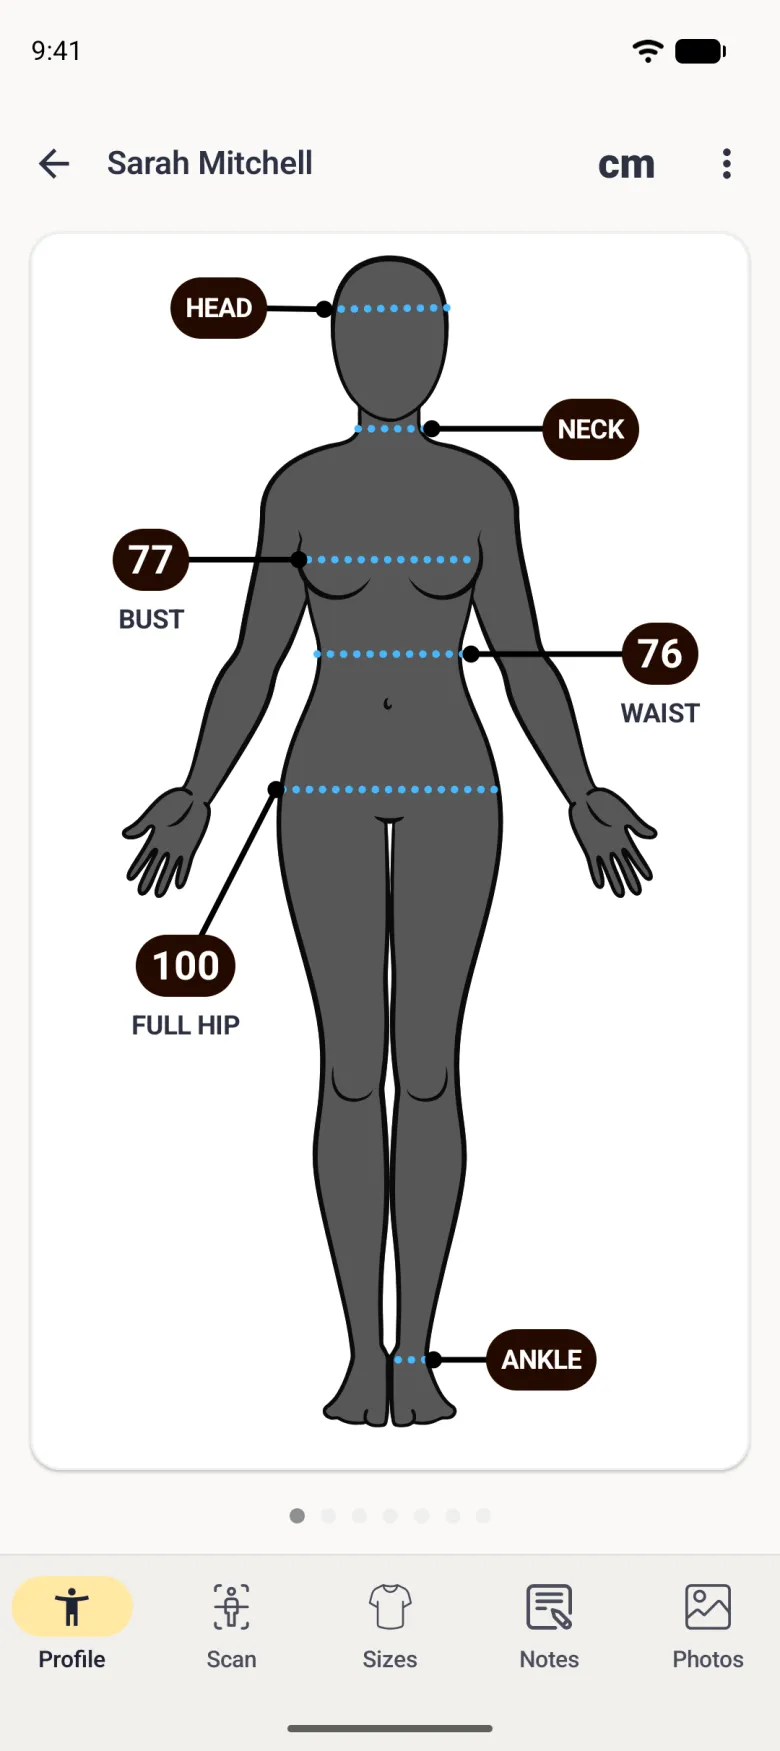
Sarah Mitchell's avatar with the Bust label now reading 77 next to the unchanged Waist 76 and Full Hip 100 labels, with Head, Neck and Ankle unmeasured.
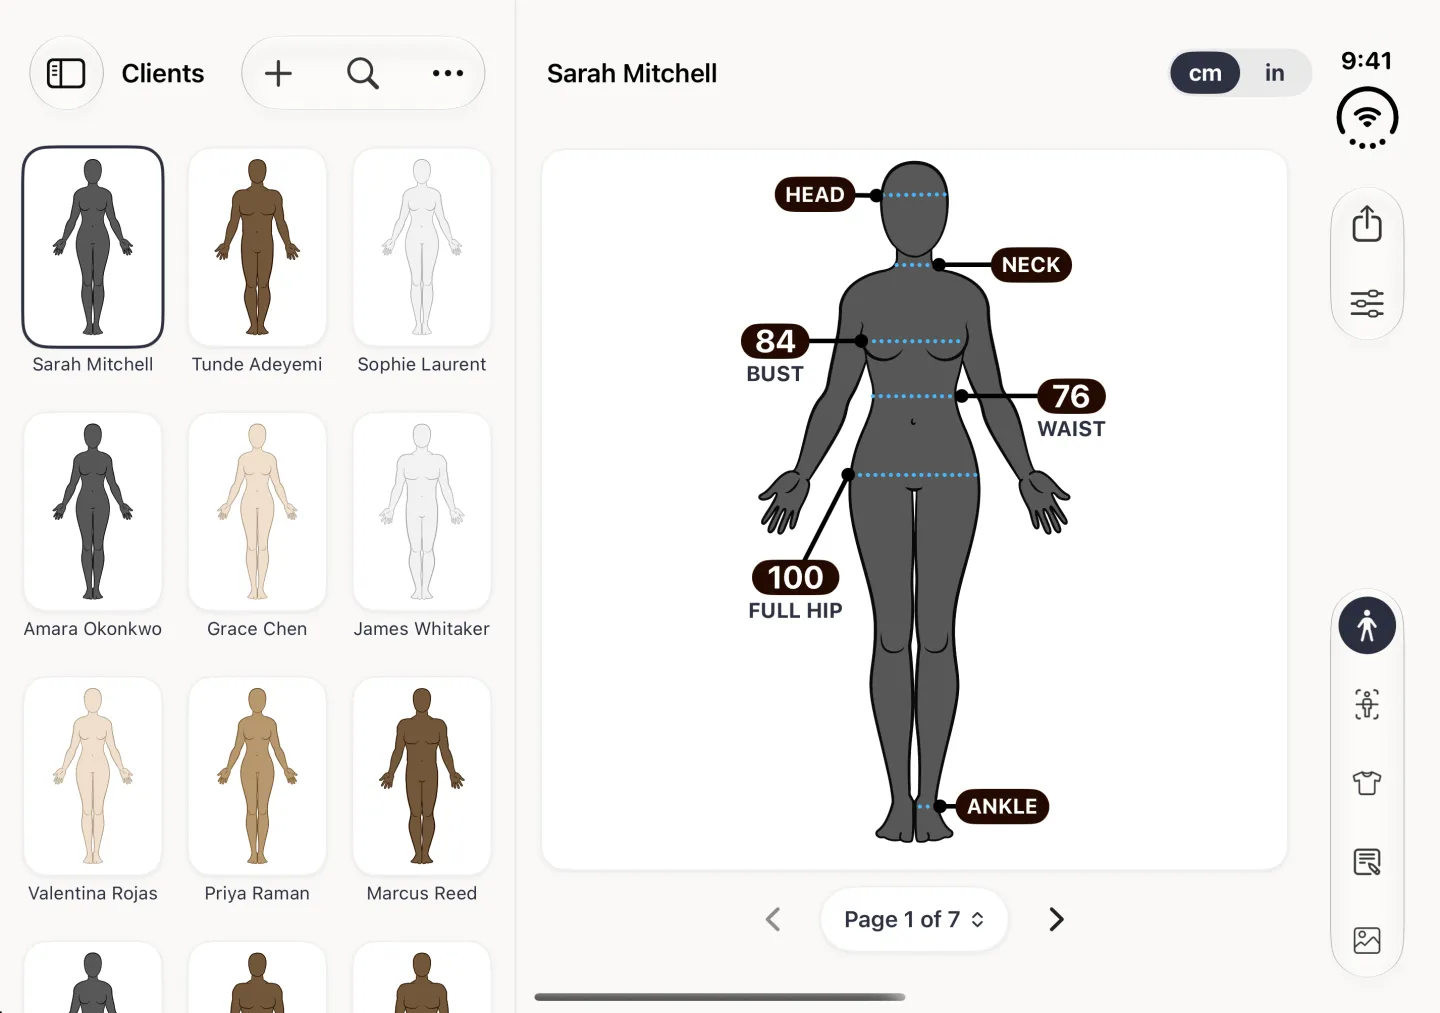
The client avatar with the Bust label now showing the drawn value as a whole number next to the unchanged Waist 76 and Full Hip 100 labels.
An accepted value lands on the profile like any other.

How do I measure along a bend, like a sleeve?

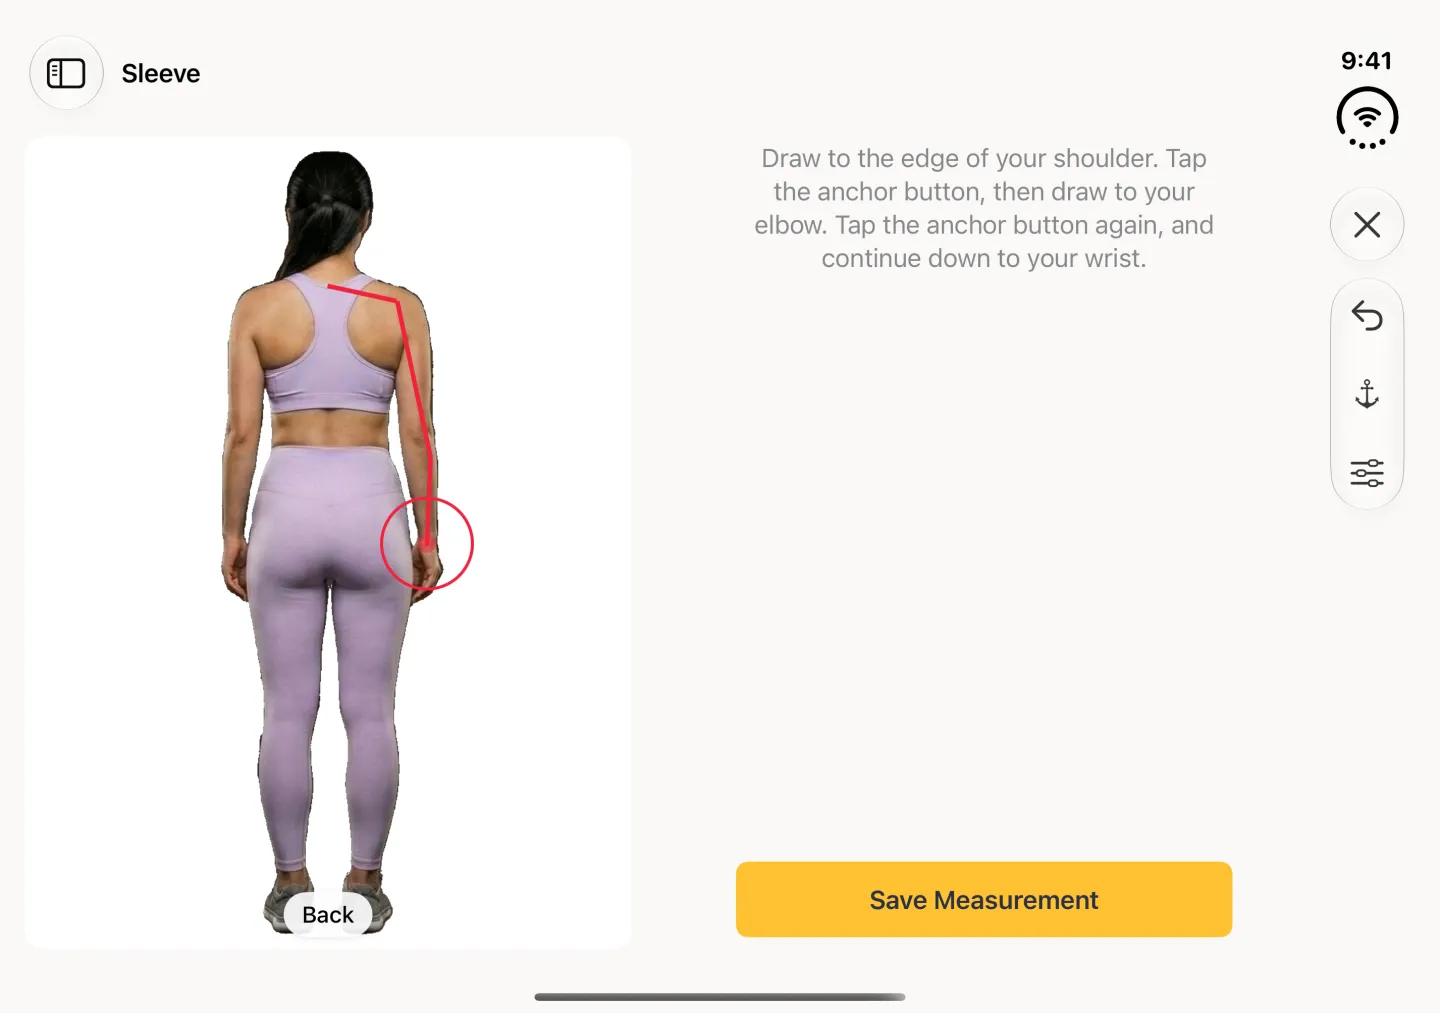
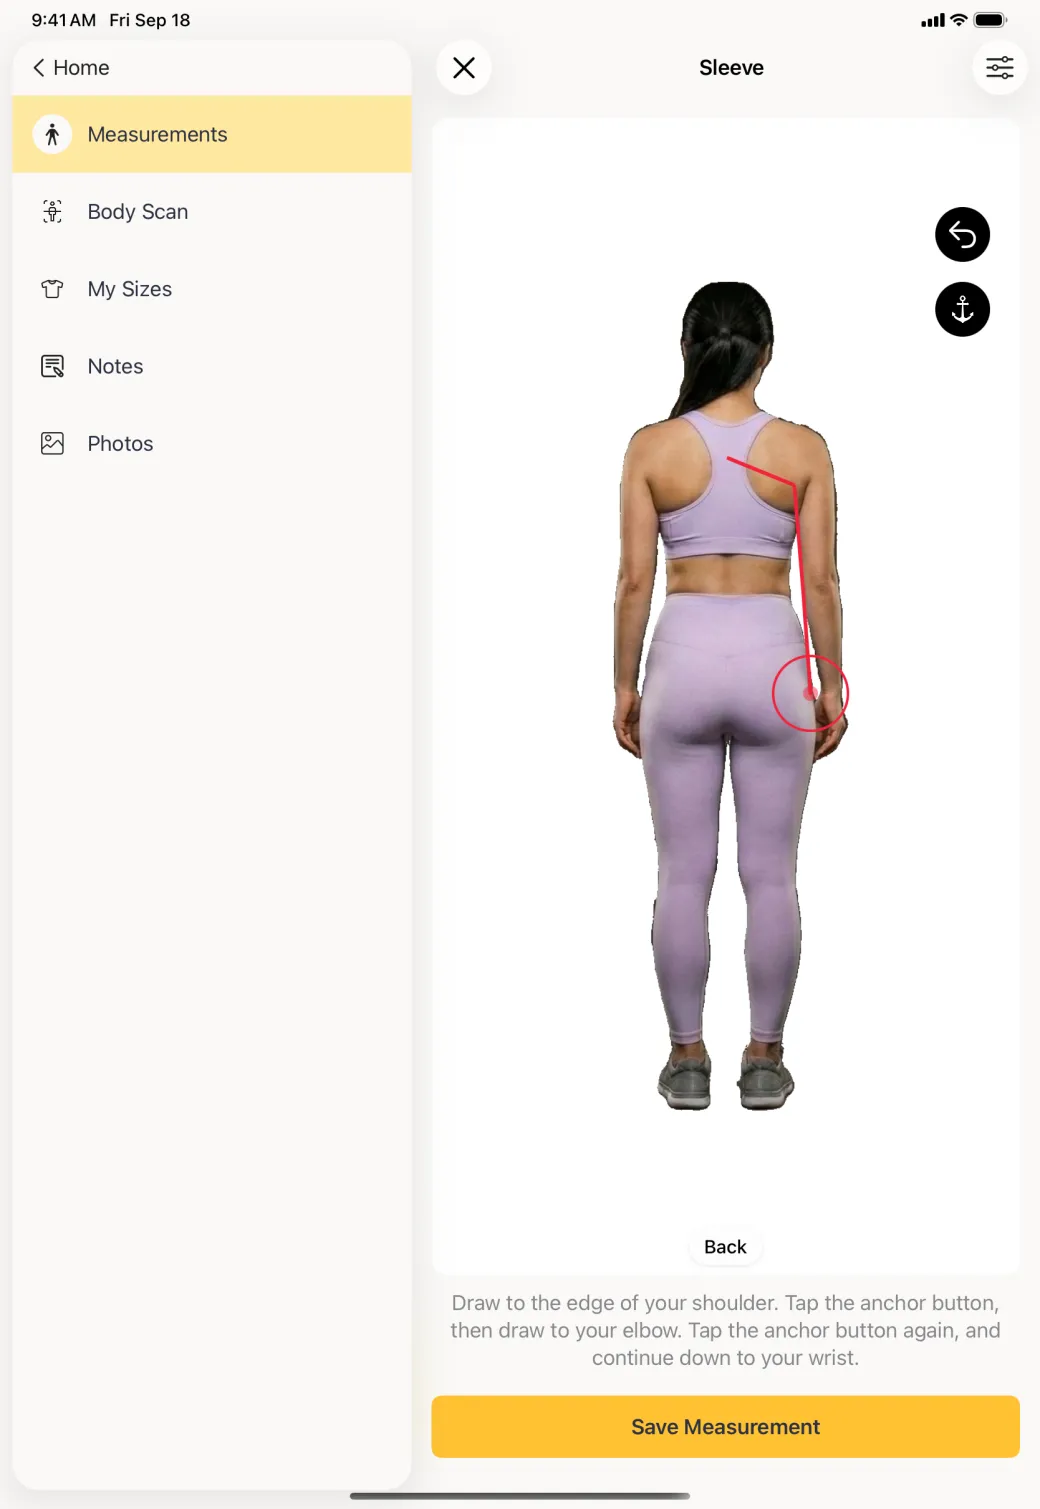
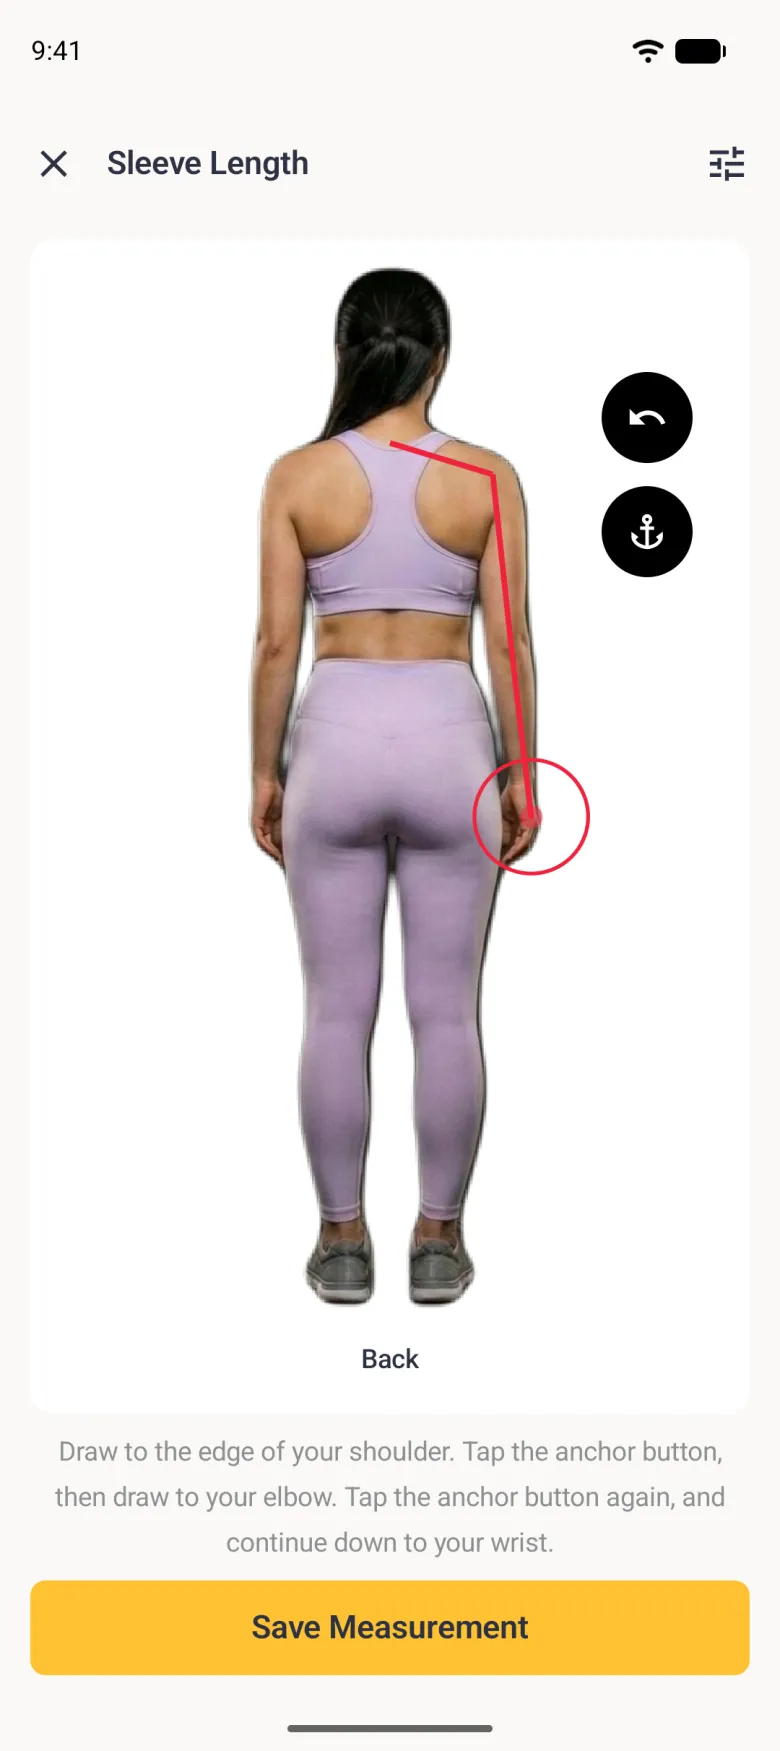
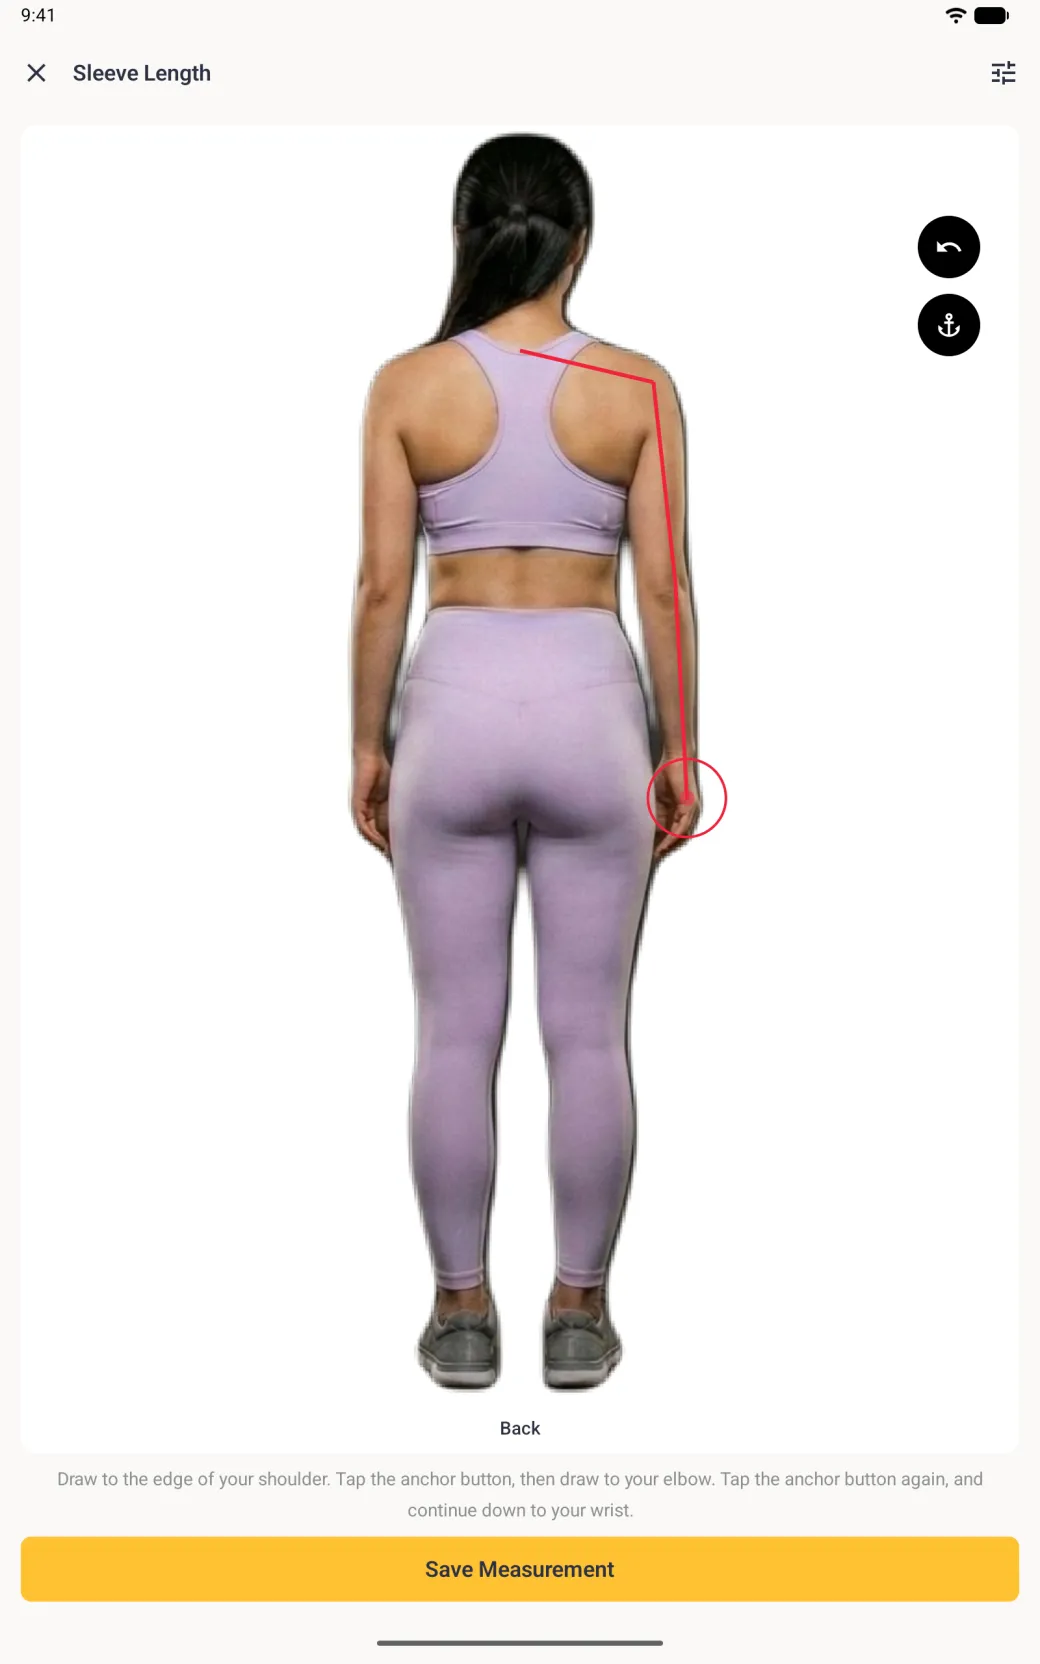
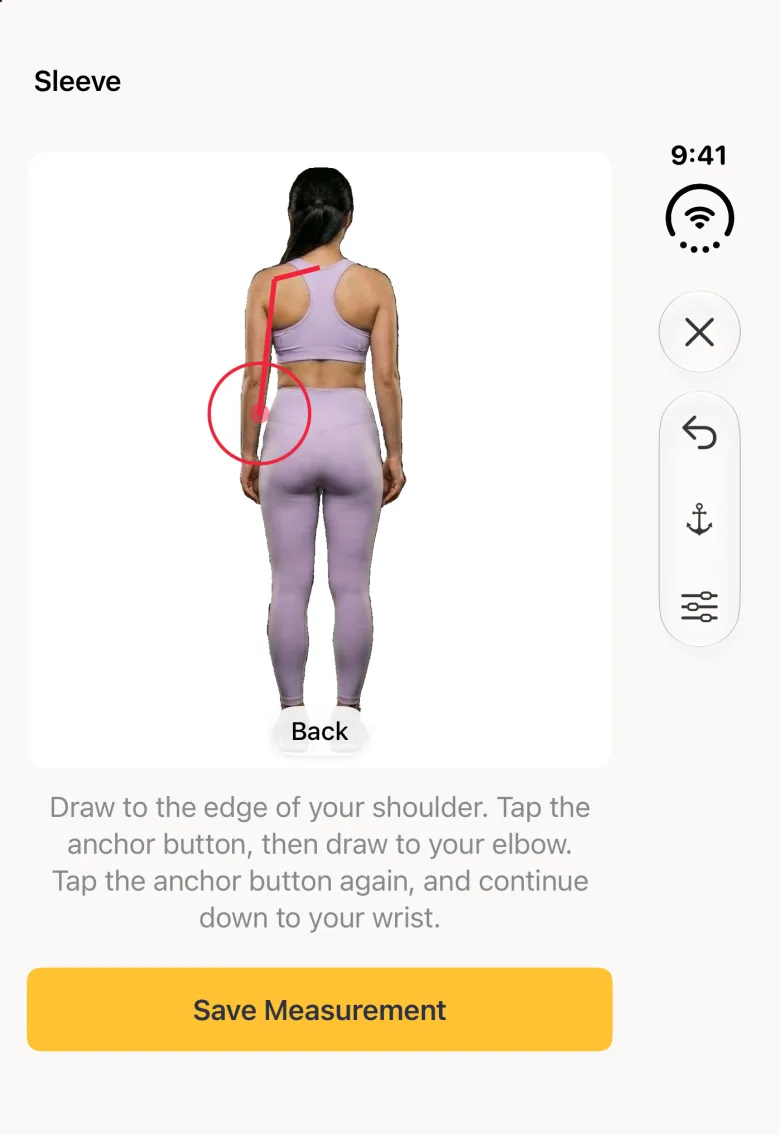
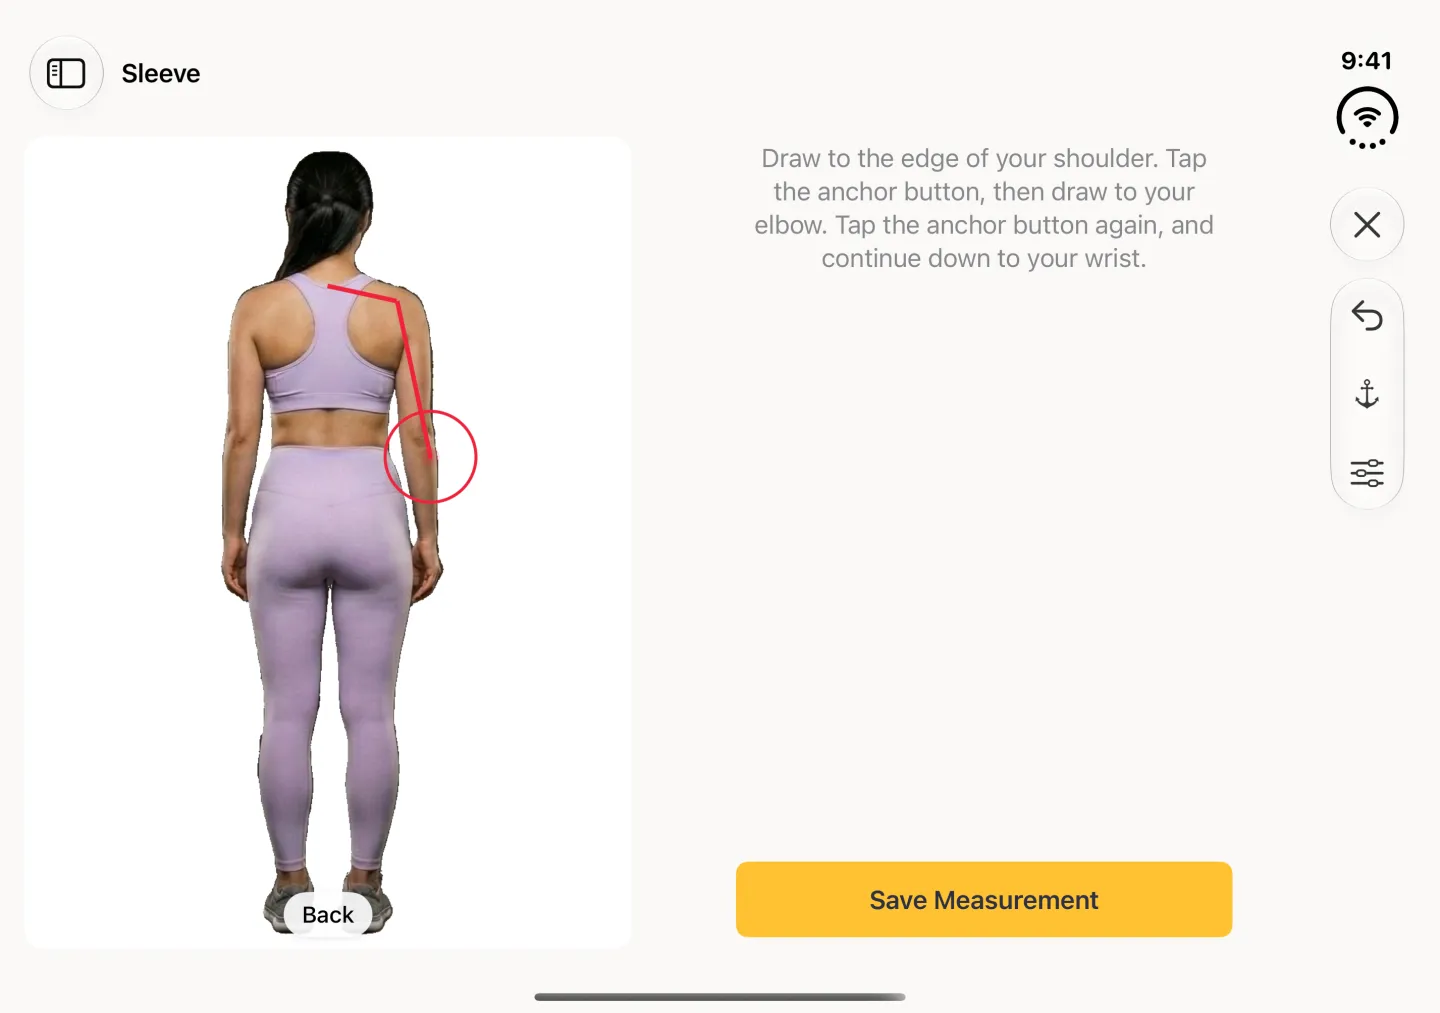
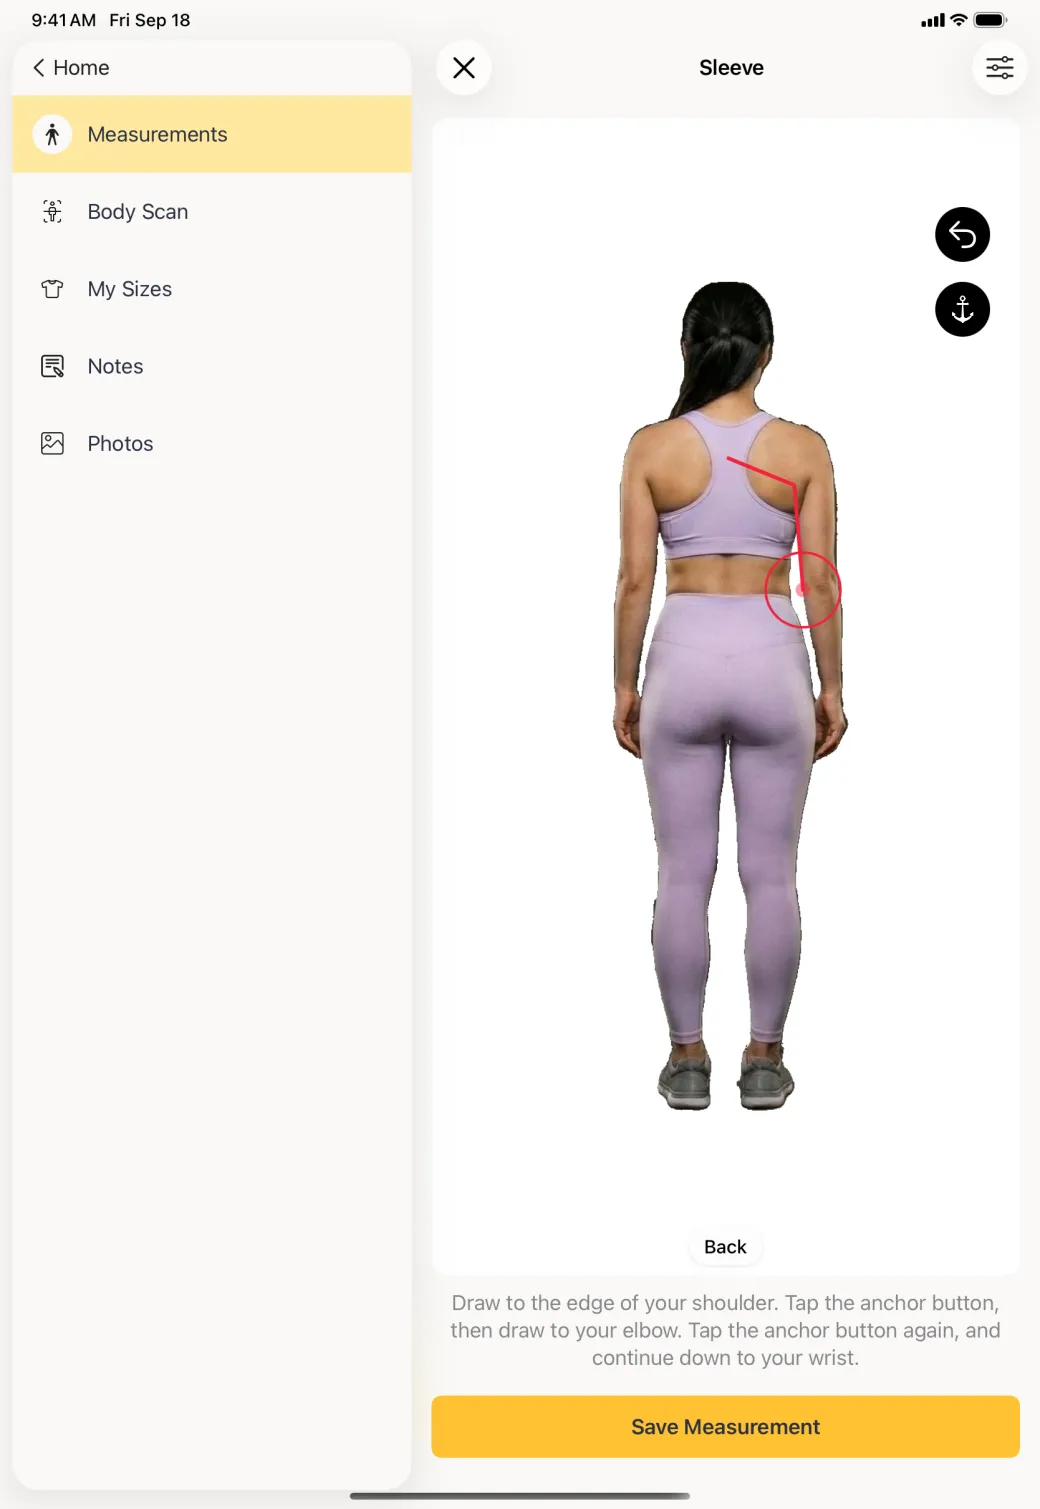
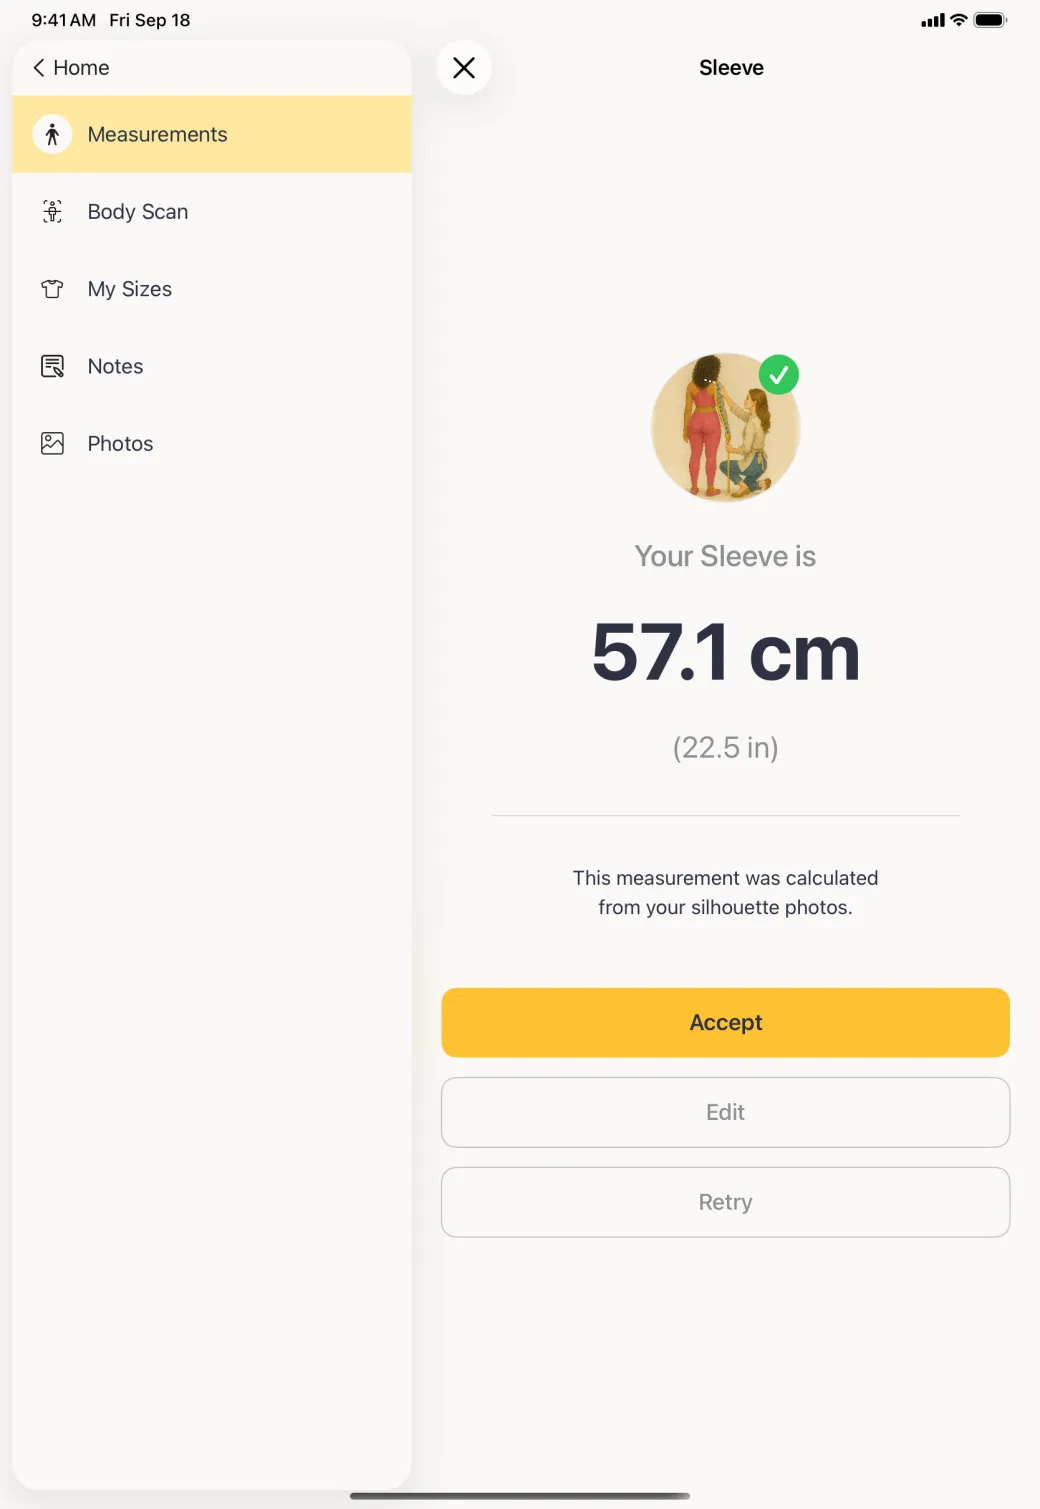
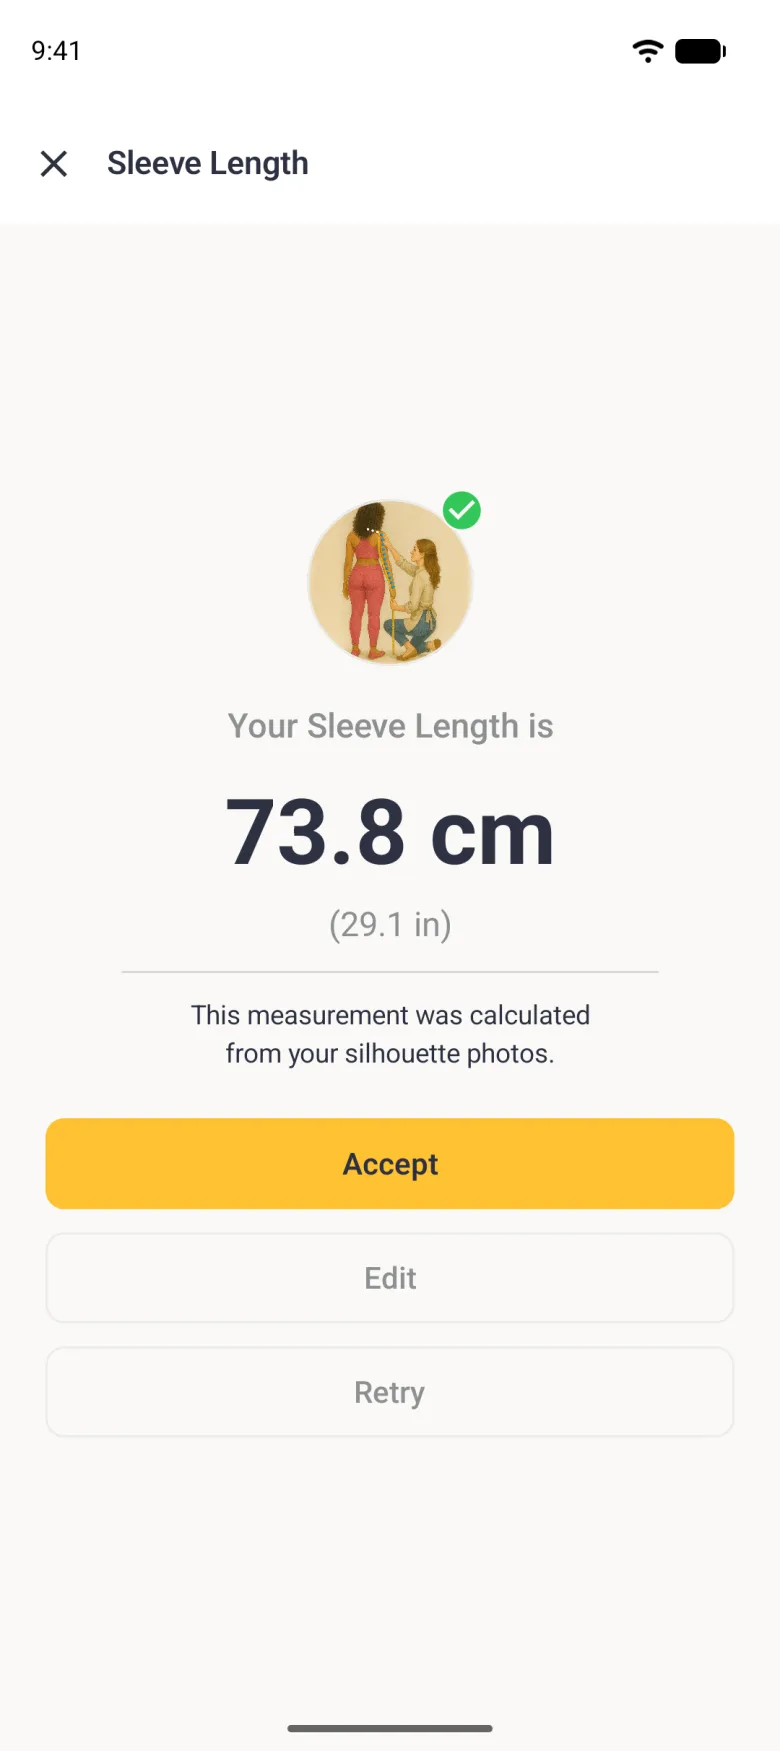
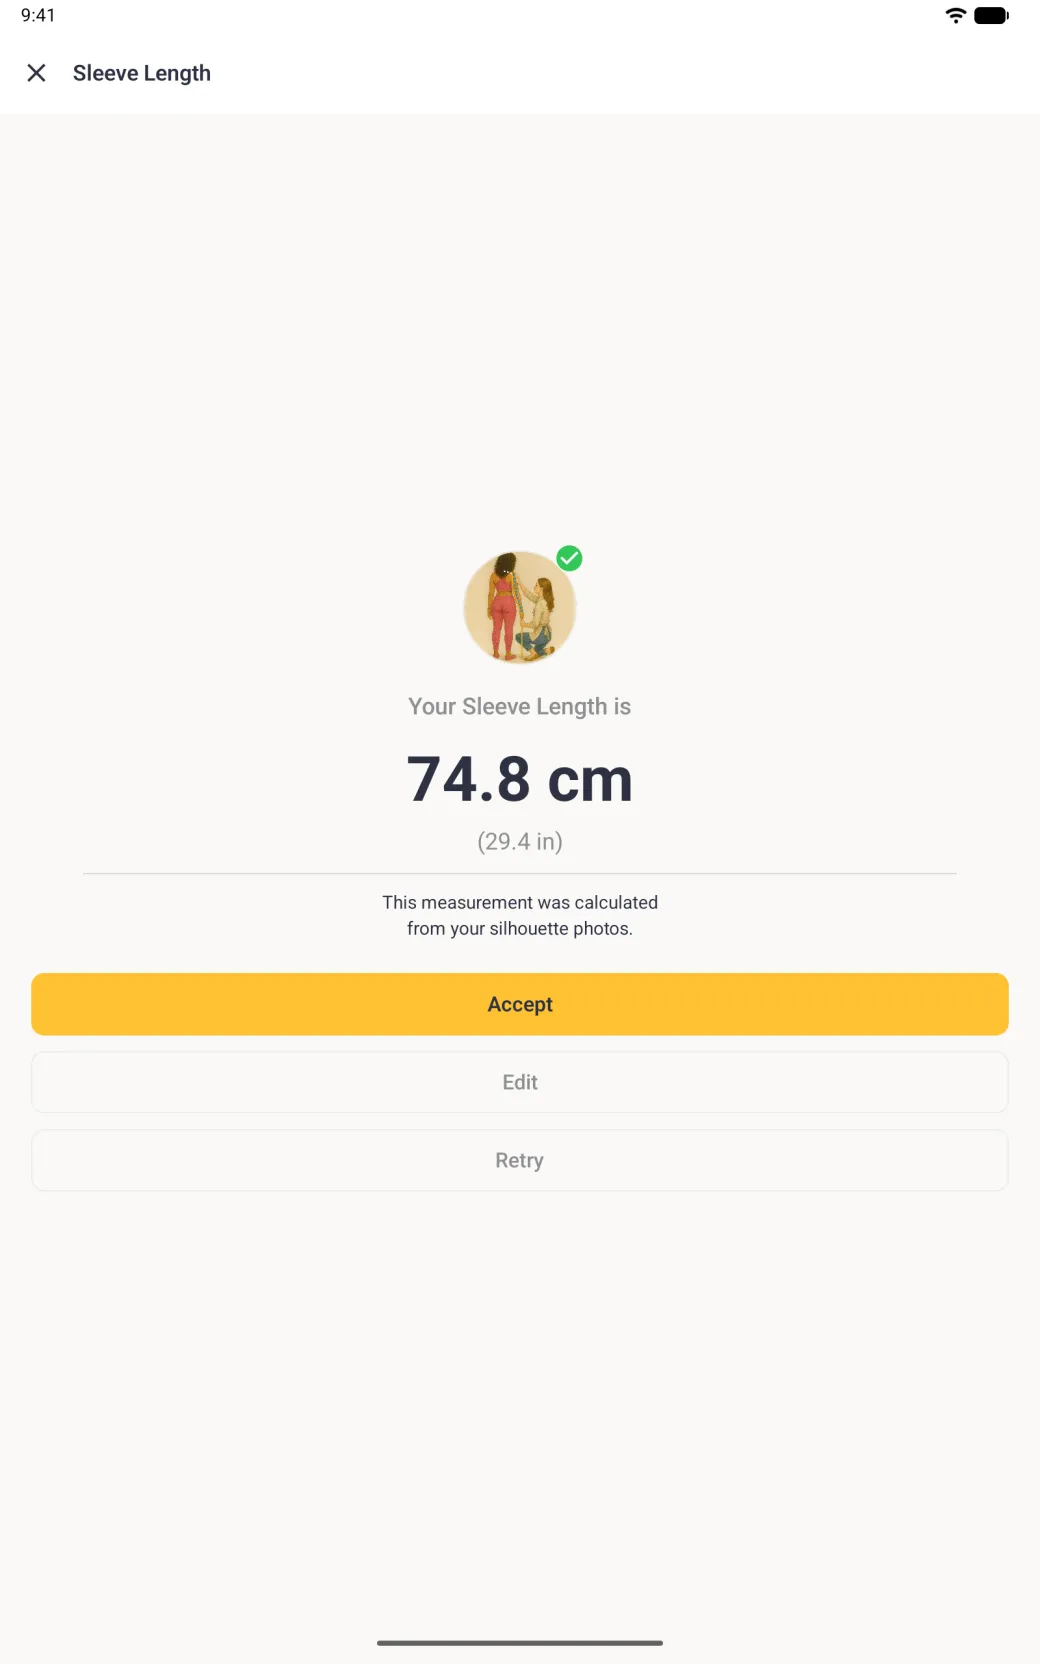
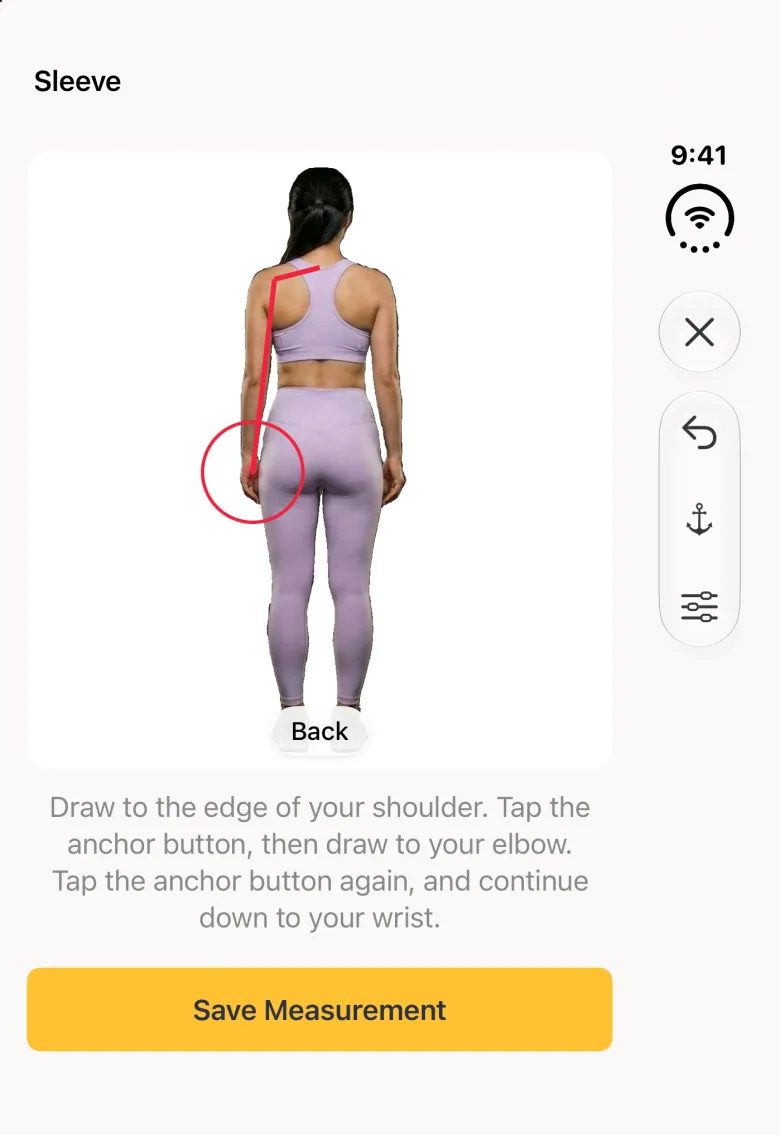
A sleeve does not run in a straight line, so it is drawn in segments with an anchor at each corner. Only one view is needed for a length like this, unlike a circumference. Each segment is added to the total, so the finished number is the whole path you traced.

  1. Tap the Sleeve label and place the marker at the base of the neck, level with the shoulders, then tap Continue.
  2. Drag out to the edge of the shoulder and tap the anchor button to fix that corner.
  3. Drag down to the elbow, anchor again, then carry on to the wrist.
  4. Tap Save Measurement, then Done, and accept the result.

The undo button above the anchor removes one segment at a time rather than the whole line, so a bad segment costs you one drag. There is no redo: to put a segment back, draw it again. The sliders button at the top right turns on the Skeleton overlay while you draw, which helps you line the anchors up with the shoulder, elbow and wrist.

Show these screens on
A back view scan photo with a red line running from the base of the neck out to the shoulder, then bending down the outside of the arm to the wrist.
A back view scan photo in the pane beside the profile sidebar, with a red line running from the base of the neck out to the shoulder, then bending down the outside of the arm to the wrist.
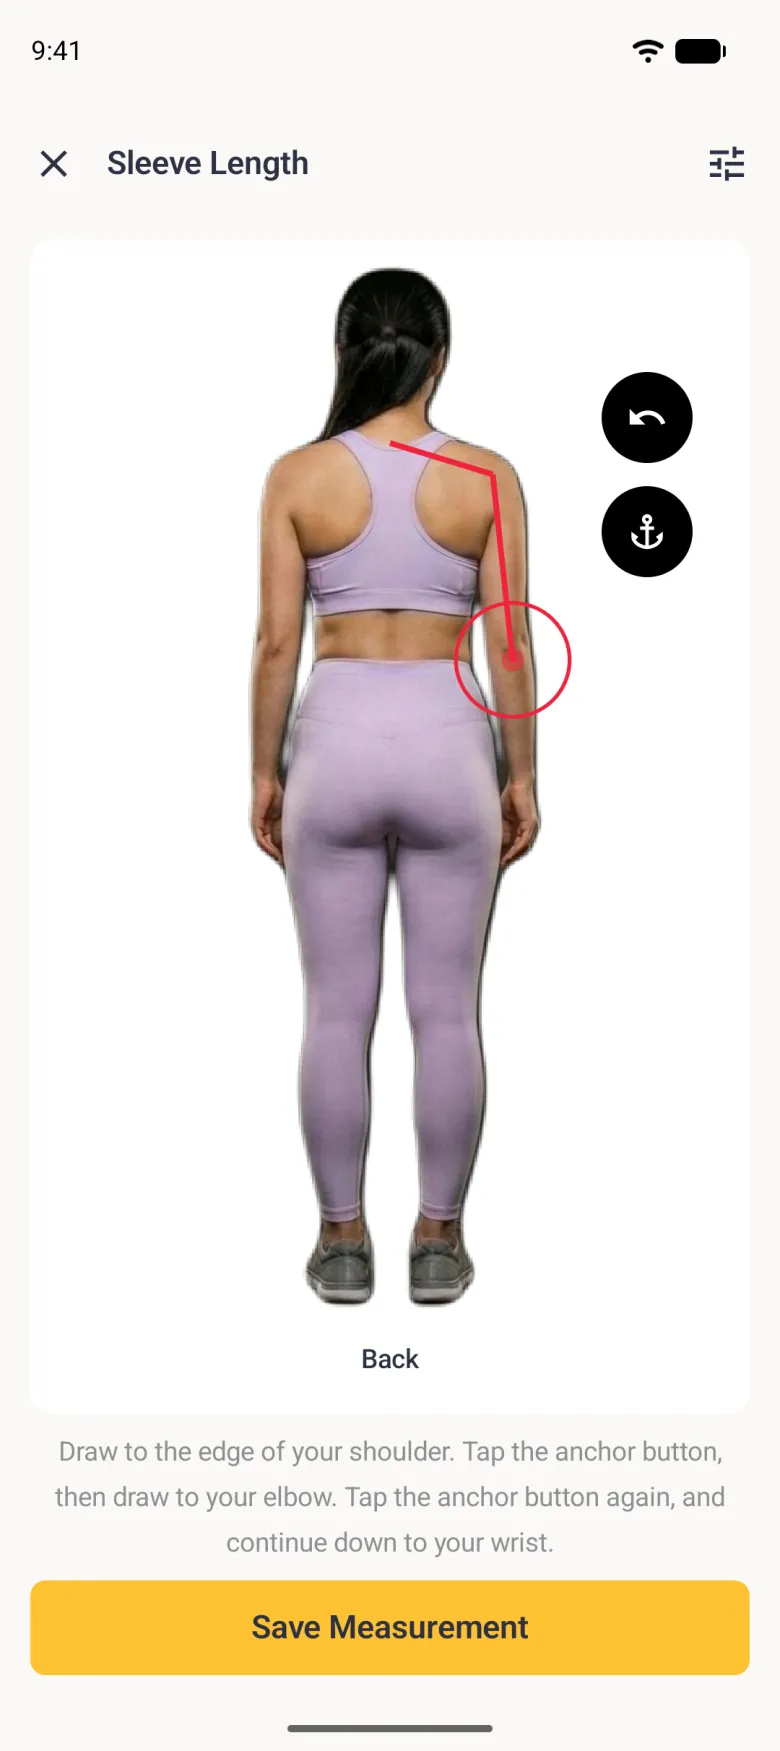
A back view scan photo with a red line running from the base of the neck out to the right shoulder, then down the outside of the arm past the elbow to the wrist, where a red target circle sits, with round undo and anchor buttons at the upper right.
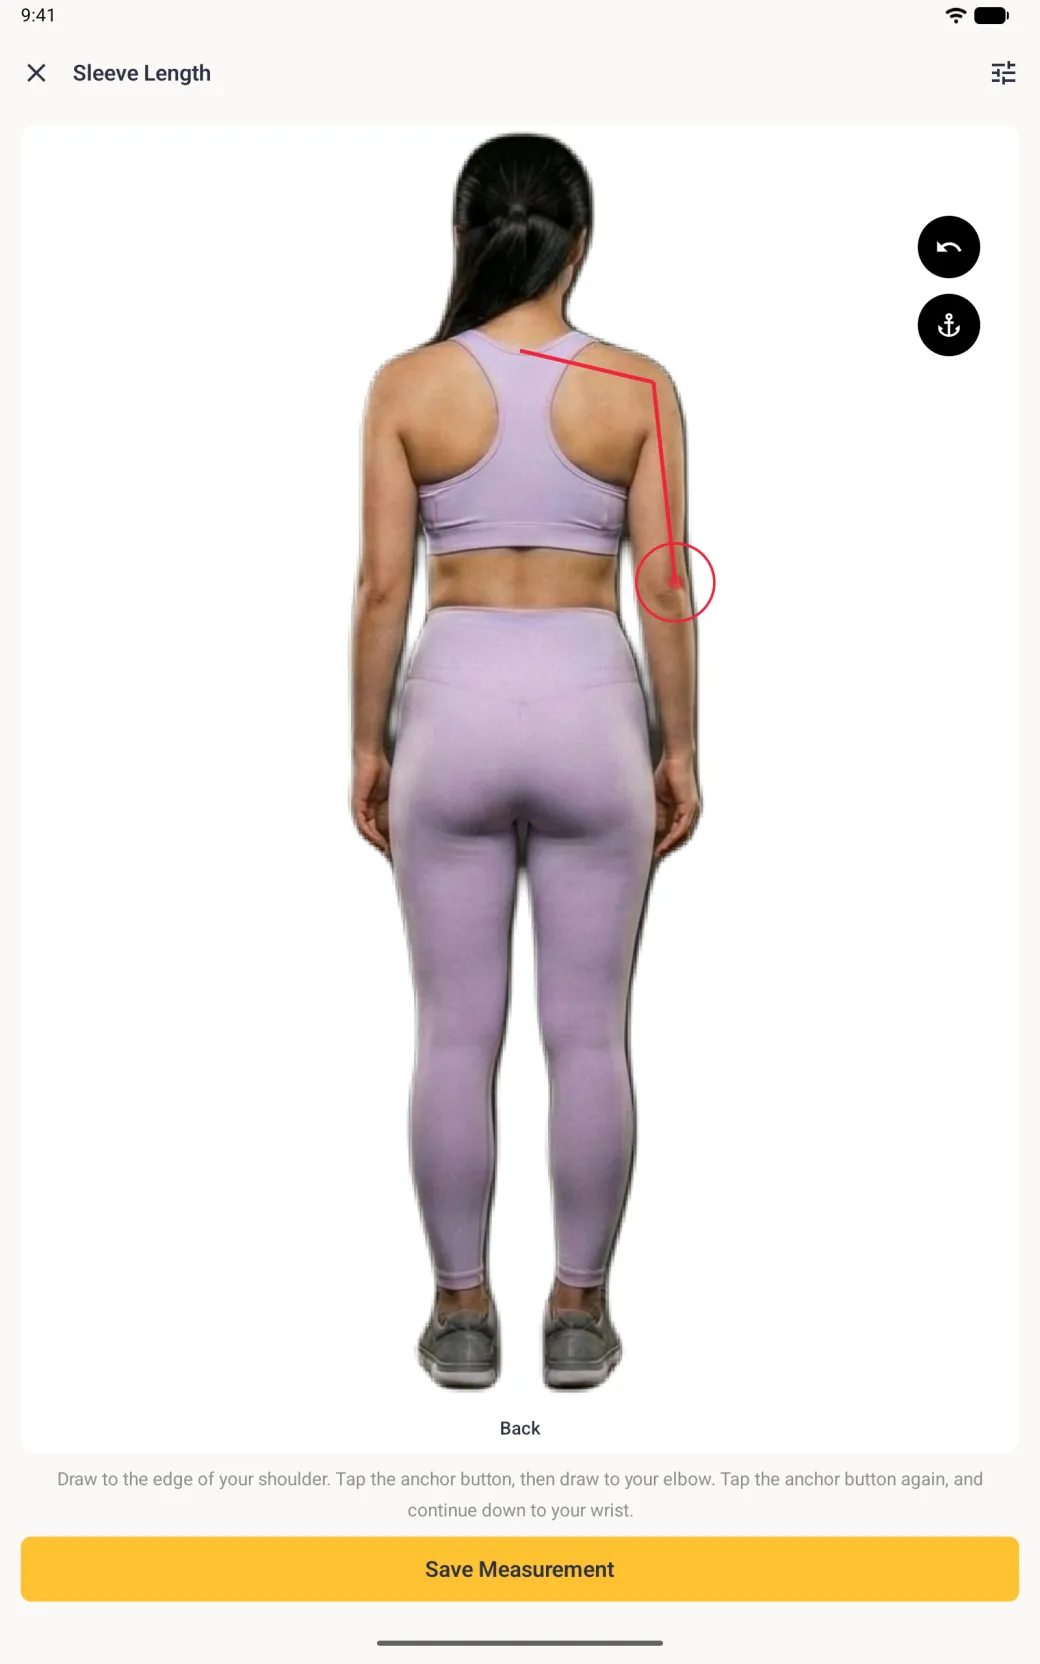
A back view scan photo with a red line running from the base of the neck out to the right shoulder, then down the outside of the arm past the elbow to the wrist, where a red target circle sits, with round undo and anchor buttons at the upper right of the card.
Anchor at each bend so the line follows the arm.
The same back view with the red line now ending at the elbow, the final segment gone.
The same back view beside the profile sidebar, with the red line now ending at the elbow and the final segment gone.
The same back view with the red line now ending at the elbow, from the neck to the shoulder and down the upper arm, with the red target circle at the elbow; the forearm segment is gone.
Undo takes back one segment, not the whole line.
A result screen reading Your Sleeve is 64.6 cm with 25.4 in below and Accept, Edit and Retry buttons.
A result screen reading Your Sleeve is 57.1 cm with 22.5 in below and Accept, Edit and Retry buttons.
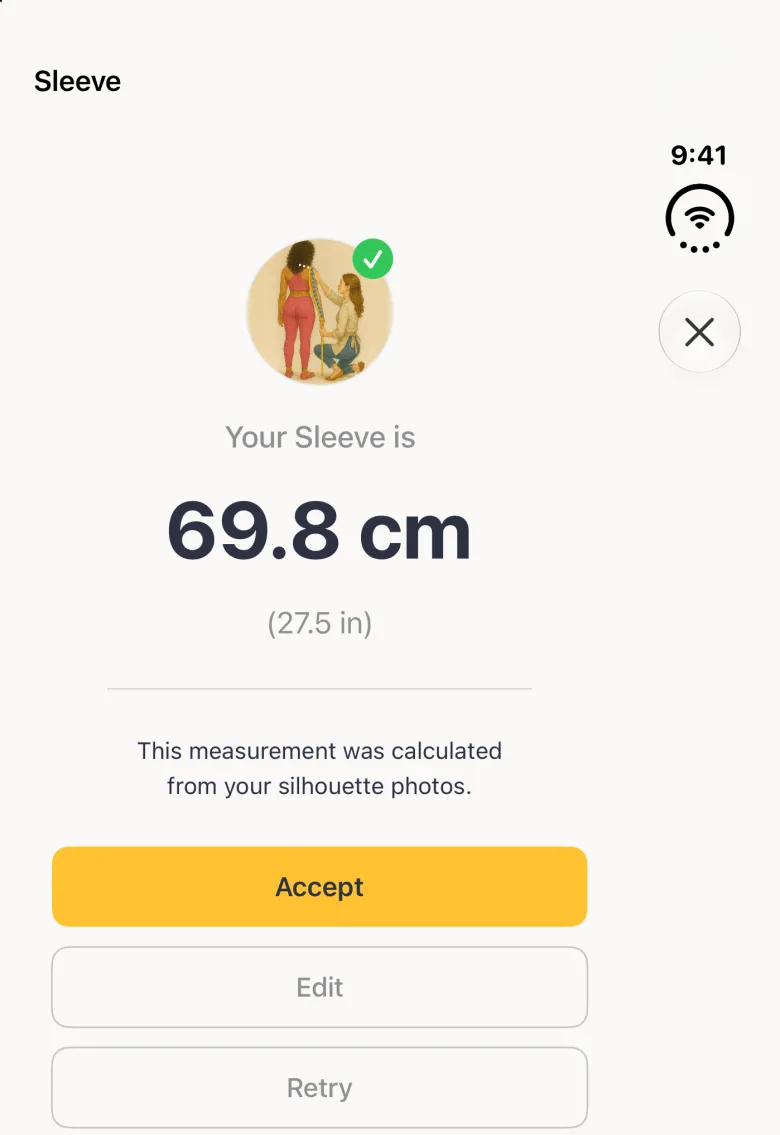
A Sleeve Length result screen with a round illustration of a tailor measuring a client's arm and a green tick, reading Your Sleeve Length is 73.8 cm with 29.1 in below, a note that it was calculated from your silhouette photos, and a gold Accept button above outlined Edit and Retry buttons.
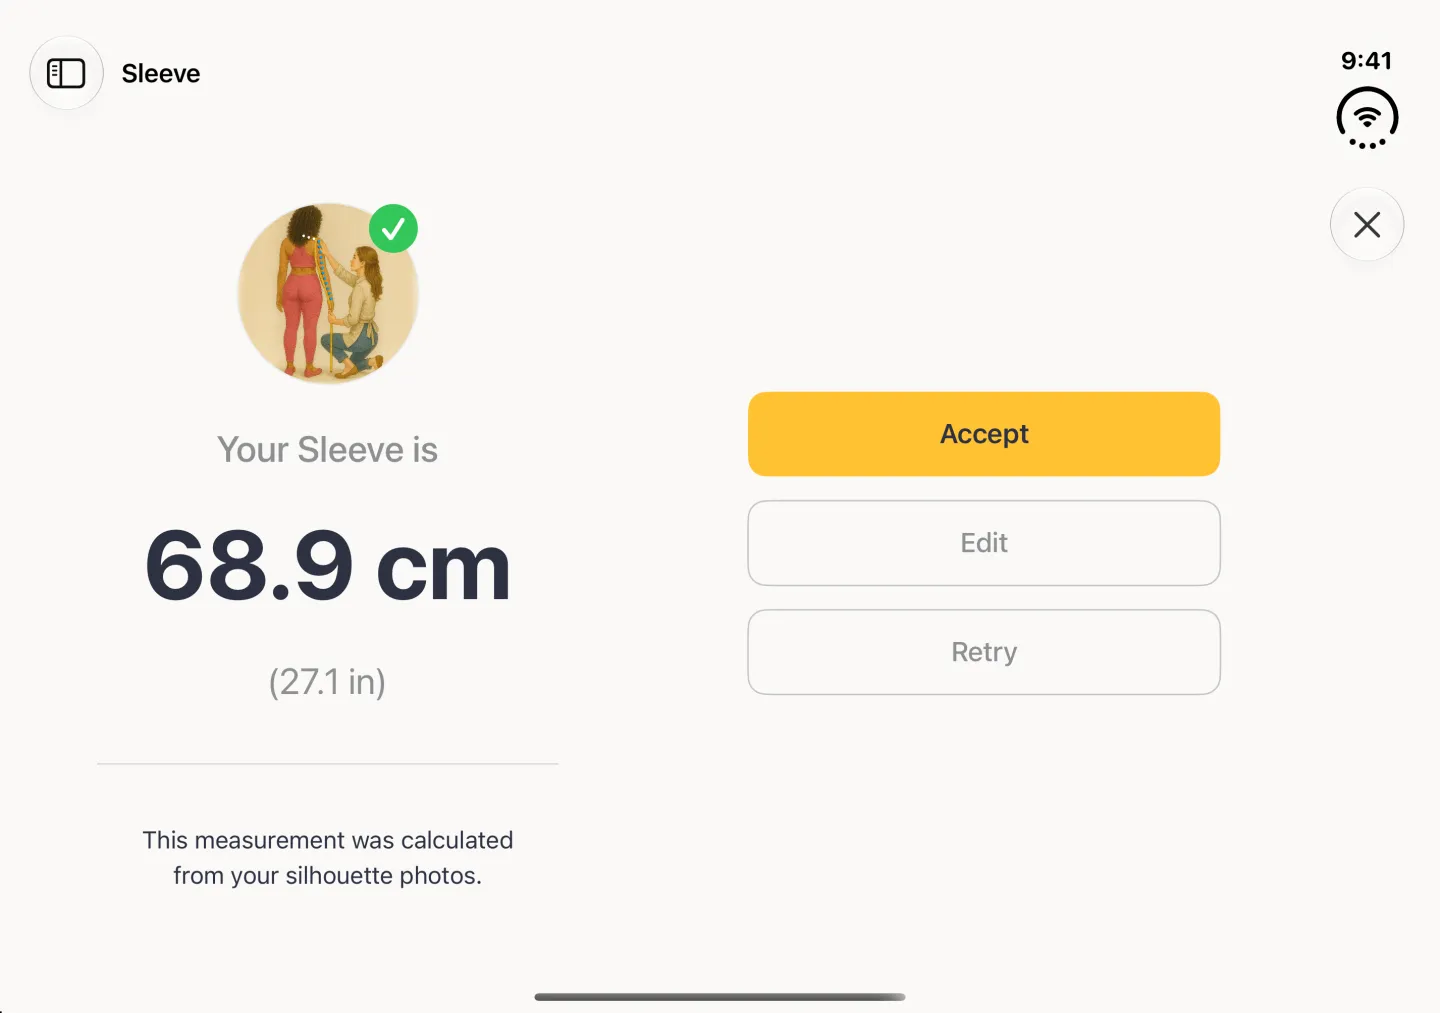
A Sleeve Length result screen centred on the tablet with a round illustration of a tailor measuring a client's arm and a green tick, reading Your Sleeve Length is followed by the calculated value in centimetres with one decimal and the inch value in brackets, a note that it was calculated from your silhouette photos, and a full-width gold Accept button above outlined Edit and Retry buttons.
The result adds up every segment you drew.